Interaction with jobs on remote kube cluster

This demo is made on a windows 10 computer. It shows how to interact with a Kube cluster in python and start a simple job on it and wait for the job to end and get its status/logs. The tricky part is to get the logs since the job object do not directly contains the info and thus, we need to get the pod associated with the job and get the pod logs. 

Kube setup (server) 

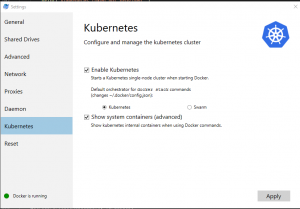
I use the Kube functionality of Docker for windows. Start Kubernetes which is part of Docker for windows 

Once the kube cluster is up and running you can interact with it from a terminal (I use PowerShell) that we will call T1 and will be use for the kube server-side interaction. 

Create service account 

PS C:\Users\charl> kubectl create serviceaccount jobdemo 
serviceaccount "jobdemo" created 

Get full permission to the SA (not clean but not the goal here) 

PS C:\Users\charl> kubectl create clusterrolebinding cluster-admin-binding --clusterrole cluster-admin --serviceaccount default:jobdemo 
clusterrolebinding.rbac.authorization.k8s.io "cluster-admin-binding" created 

Get secret token of the SA (from the secrets) 

PS C:\Users\charl> kubectl get secret jobdemo-token-jk59q -o json 

… 
"token": "ZXlKaGJHY2lPaUpTVXpJMU5pSXNJbXRwWkNJNklpSjkuZXlKcGMzTWlPaUpyZFdK...F6bDlKUUFGSF94Q3BvMVE=" 
… 

It s base64…decode it in a string and save it.

Python script setup (client) 

Start a new powershell terminal (let’s call it T2) to work on this part. Build the container from the dockerfile included in the repo 

PS C:\Code\kubejobs> docker build -t quicktest . 

Start the container and mount the repo in the container (not mandatory but allow to edit code in windows) 

PS C:\Code\kubejobs> docker run -it -v C:\Code\kubejobs:/mountfolder quicktest 

Export the token (the decode version of the base64 token we retrieved previously) 

[root@54a8362da7d1 mountfolder]# export KUBE_TOKEN=eyJhbGciOiJSUzI1NiIsImtpZCI...Es5howDOSTWqzl9JQAFH_xCpo1Q 

Start the python script 

[root@54a8362da7d1 mountfolder]# python3.6 kubeJobsDemo.py 
Starting 
Starting job 
Checking job status 
Job is still running. Sleep 1s 
Checking job status 
Job is still running. Sleep 1s 
Checking job status 
Job is still running. Sleep 1s 
Checking job status 
Job is still running. Sleep 1s 
Checking job status 
Job is still running. Sleep 1s 
Checking job status 
Job is still running. Sleep 1s 
Checking job status 
Job is still running. Sleep 1s 
Checking job status 
Job is over 
getting job pods 
Checking job status 
getting job logs 
Job is over without error. Here are the logs:  3.141592653589793 
Cleaning up the job 
Ending 
[root@54a8362da7d1 mountfolder]# 

You can also chech the job creation when the python script is running (but not after because job is deleted at the end) from the T1 terminal used before. 

PS C:\Users\charl> kubectl get jobs 
NAME      DESIRED   SUCCESSFUL   AGE 
pi        1         0            3s 

As you can see, we also print the logs of the job. I use this python script daily when I spawn jobs on a remote Kube cluster from a Jenkins server (my Jenkins jobs are just spawning Kube job on remote cluster and waiting for them to be over). I’m sharing it hoping it can help some ppl. 

The code is quite simple and the only tricky part is to get the pod associated to the job so that we can get the logs (BTW this may not works in case the job spawn several pods). 

The link Job-Pod is done with the use of selector since it was the recommended methode when I done the script (https://github.com/kubernetes/kubernetes/issues/24709) 

Full code is here: https://bitbucket.org/charly37/kubejobs/src/master/

My favorite way to work with linux container on windows10

Often i need to write code for Linux server on a win10 ENV. Before I was using VM (virtualbox/vagrant) but here is my new way to do it.

Create windows folder that will be mount: C:\Code\dockermount
Start the docker image and mount the folder in /mountfolder

docker run -it ubuntu:18.04 -v C:\Code\dockermount\:/mountfolder

You can now work on windows with your preferred editor and run the code in the linux ubuntu container

Docker clean up – win 10

PS C:\Code\Devenv> docker system df
TYPE TOTAL ACTIVE SIZE RECLAIMABLE
Images 10 7 3.236GB 2.386GB (73%)
Containers 30 0 1.256GB 1.256GB (100%)
Local Volumes 0 0 0B 0B
Build Cache 0 0 0B 0B

PS C:\Code\Devenv> docker container prune

PS C:\Code\Devenv> docker volume prune

PS C:\Code\Devenv> docker image prune -a #-a to remove all images

PS C:\Code\Devenv> docker system df
TYPE TOTAL ACTIVE SIZE RECLAIMABLE
Images 0 0 0B 0B
Containers 0 0 0B 0B
Local Volumes 0 0 0B 0B
Build Cache 0 0 0B 0B

Basic auth with kube python lib

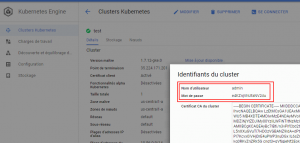
When a Kube cluster is created on Google Kube Engine you have access to a user/password combination that you could use to authenticate with Kube API.

This method of authentication is part of the official documentation of kubernetes:  

“Kubernetes uses client certificates, bearer tokens, an authenticating proxy, or HTTP basic auth to authenticate….” From https://kubernetes.io/docs/admin/authentication/ 

I wanted to try this authentication method with the official kubernetes python client: https://github.com/kubernetes-client/python 

Remote cluster 

The first issue I had was to specify a remote cluster since all the example of the API used a .kubeconfig and suppose that the kube client is on the server (and usable).  

After some digging I find the proper options and made a PR to add such example in the API doc: https://github.com/kubernetes-client/python/pull/446 

Bearer token auth 

The second issue was due to the BASIC authentication. There is already a ticket open about it (just few days before): https://github.com/kubernetes-client/python/issues/430 

There was no solution in it so I decided to dig in 😉 

After reading the code of the API I was only able to find the “bearer token” authentication method. There was nothing about the BASIC auth. I decided first to try the “bearer token” method to ensure the rest of my code was working fine. I submit an example of it on the ticket with the code below: 

from kubernetes import client, config 

#see https://kubernetes.io/docs/tasks/administer-cluster/access-cluster-api/#accessing-the-cluster-api to know how to get the token 
#The command look like kubectl get secrets | grep default | cut -f1 -d ' ') | grep -E '^token' | cut -f2 -d':' | tr -d '\t' but better check the official doc link  

aToken="eyJhXXXXXXXX82IKq0rod1dA" 

# Configs can be set in Configuration class directly or using helper utility 
configuration = client.Configuration() 
configuration.host="https://XXX.XXX.XXX.XXX:443" 
configuration.verify_ssl=False 
configuration.debug = True 


#Maybe there is a way to use these options instead of token since they are provided in Google cloud UI 
#configuration.username = "admin" 
#configuration.password = "XXXXXXXXXXX" 

configuration.api_key={"authorization":"Bearer "+ aToken} 
client.Configuration.set_default(configuration) 

v1 = client.CoreV1Api() 
print("Listing pods with their IPs:") 
ret = v1.list_pod_for_all_namespaces(watch=False) 
for i in ret.items: 
    print("%s\t%s\t%s" % (i.status.pod_ip, i.metadata.namespace, i.metadata.name)) 

It allows me to validate the “remote” cluster communication and also the token authentication nevertheless it is not my final goal. 

Basic auth 

Python kube API hack 

I spend some time digging in the code and did not find any code related to the BASIC auth. I check in the code and the method “get_basic_auth_token” in configuration.py is never call anywhere (and it is the only one dealing with username/password field). 

Then I try to “hack” a little the python code by modifying the class configuration and change its auth_setting with that 

def auth_settings(self): 
    """ 
    Gets Auth Settings dict for api client. 
    :return: The Auth Settings information dict. 
    """ 
    return { 
        'BearerToken': 
            { 
                'type': 'api_key', 
                'in': 'header', 
                'key': 'authorization', 
                'value': self.get_api_key_with_prefix('authorization') 
            }, 
            'http_basic_test': 
            { 
                'type': 'basic', 
                'in': 'header', 
                'key': 'Authorization', 
                'value': self.get_basic_auth_token() 
            }, 
    } 

I just added the “http_basic_test” here. Then you can take any functional class like “”core_v1_api and modify the method you plan to use (list_pod_for_all_namespaces_with_http_info in my case) and modify the auth part of the code. Replace:

auth_settings = ['BearerToken']

with

auth_settings = ['http_basic_test']

and then you can use username/password to authenticate (I verified and it works) 

You should have valid response and even see the basic auth info if you activate debug log (like it is done in my previous answer):

send: b'GET /version/ HTTP/1.1\r\nHost: XXX.XXX.XXX.XXX\r\nAccept-Encoding: identity\r\nAccept: application/json\r\n
Content-Type: application/json\r\nUser-Agent: Swagger-Codegen/4.0.0/python\r\nAuthorization: Basic YWRXXXXXXXXXXXRA==\r\n\r\n' 

This confirms that the basic auth can be used (as the kubernetes mentioned) but is not accessible from the python API.  

Clean solution 

The previous hack allowed me to be sure that I could authenticate with the cluster using the user//password nevertheless we cannot keep such dirty hack.  

After some investigation I find out the Python kube client is generated by swagger. The generator code is located here: https://github.com/kubernetes-client/gen 

This repo relies on the kubernetes swagger file located on the kubernetes repo: 

https://raw.githubusercontent.com/kubernetes/kubernetes/master/api/openapi-spec/swagger.json 

The URI of the swagger file is partialy hardcoded in the python file preprocess_spec.py 

spec_url = 'https://raw.githubusercontent.com/kubernetes/kubernetes/' \ 
             '%s/api/openapi-spec/swagger.json' % sys.argv[2] 

Then I check the swagger file with a specific look on the security part: 

  "securityDefinitions": { 
   "BearerToken": { 
    "description": "Bearer Token authentication", 
    "type": "apiKey", 
    "name": "authorization", 
    "in": "header" 
   } 
  }, 
  "security": [ 
   { 
    "BearerToken": [] 
   } 
  ] 

So there is indeed ne reference to any BASIC authentication process here. This is strange since the official doc mention it and since we just validated it works fine. 

Let’s try to generate again the python kube library after adding the BASIC auth in the swagger file 😉 

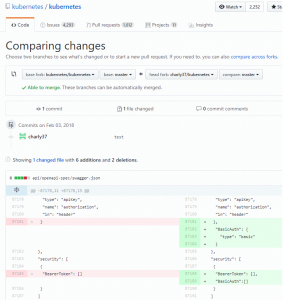
So I fork the kubernetes repo and modify the swagger file: 

"securityDefinitions": { 
   "BearerToken": { 
    "description": "Bearer Token authentication", 
    "type": "apiKey", 
    "name": "authorization", 
    "in": "header" 
   }, 
    "BasicAuth": { 
      "type": "basic" 
    } 
  }, 
  "security": [ 
   { 
    "BearerToken": [], 
    "BasicAuth":[] 
   } 
  ] 

(you can see the diff here: https://github.com/kubernetes/kubernetes/compare/master…charly37:master) 

Then we need to patch the generator to use my fork swager file. I just change the URI in preprocess_spec.py with: 

    spec_url = 'https://raw.githubusercontent.com/charly37/kubernetes/' \ 
               '%s/api/openapi-spec/swagger.json' % sys.argv[2] 

And then generate again the python library with: 

./python.sh test test.sh 

This comes from the README of the generator here: https://github.com/kubernetes-client/gen and the test.sh file content is: 

[charles@kube openapi]$ cat test.sh 
export KUBERNETES_BRANCH=master 
export CLIENT_VERSION=1.0.0b1 
export PACKAGE_NAME=kubernetes 

This will start a docker container and build the python library in the output directory which is ./test in our case: 

…
[INFO] ------------------------------------------------------------------------ 
[INFO] BUILD SUCCESS 
[INFO] ------------------------------------------------------------------------ 
[INFO] Total time: 11.396 s 
[INFO] Finished at: 2018-02-03T22:18:51Z 
[INFO] Final Memory: 26M/692M 
[INFO] ------------------------------------------------------------------------ 
---Done. 
---Done. 
--- Patching generated code... 
---Done. 

To be sure that the new security setup was taken into account we check the new python code and more specifically the configuration.py file with 

vi test/kubernetes/configuration.py 

leading to see:

    # Authentication Settings 
    # dict to store API key(s) 
    self.api_key = {} 
    # dict to store API prefix (e.g. Bearer) 
    self.api_key_prefix = {} 
    # Username for HTTP basic authentication 
    self.username = "" 
    # Password for HTTP basic authentication 
    self.password = "" 

We now have parameters related to the BASIC authentication. Seems very good 😉 

We install this generated library with: 

[root@kube test]# python setup.py install 

The last piece of the test is to replace the bearer token in our test script with these new parameters: 

    aUser = "admin" 
    aPassword = "e4KZnjVhUfaNV2du" 
... 
    #configuration.api_key = {"authorization": "Bearer " + aToken} 
    configuration.username = aUser 
    configuration.password = aPassword 

And run the script: 

[root@kube ~]# python kubeConect.py 

Listing pods with their IPs: 

[root@kube ~]# python kubeConect.py
Listing pods with their IPs:
/usr/lib/python2.7/site-packages/urllib3-1.22-py2.7.egg/urllib3/connectionpool.py:858: InsecureRequestWarning: Unverified HTTPS request is being made. Adding certificate verification is strongly advised. See: https://urllib3.readthedocs.io/en/latest/advanced-usage.html#ssl-warnings
  InsecureRequestWarning)
10.56.0.8       kube-system     event-exporter-v0.1.7-91598863-kkzgw
10.56.0.2       kube-system     fluentd-gcp-v2.0.9-nc8th
10.56.0.10      kube-system     heapster-v1.4.3-2870825772-h9z8j
10.56.0.7       kube-system     kube-dns-3468831164-t5ggk
10.56.0.3       kube-system     kube-dns-autoscaler-244676396-r5rnm
10.128.0.2      kube-system     kube-proxy-gke-test-default-pool-477f49cb-fksp
10.56.0.4       kube-system     kubernetes-dashboard-1265873680-kzdn2
10.56.0.6       kube-system     l7-default-backend-3623108927-rkv9w

Iworks !! Now we know that if we update the swagger file we will be able to use the BASIC auth with the python kube client library. The last step is to talk with the rest of the community to find out why the BASIC auth is not supported on the client libs (all generated from the swagger file) even if it is activated on Kube and present in the official doc… 

MS Office suite: Add on for Crypto currency tracker

This article is the part 2 of 2 on my adventure of creating plugins for Google suite et MS office suite. The 2 plugins have the same goal which is retrieve the value of cryptocurrency from various exchanges. The first article was explaining the plugin creation for Google Suite and is available HERE. This article focuses on the plugin creation for the Microsoft office Suite.

Development environment 

There are 2 main choices for the tooling around Office Online plugin development: Visual Studio or DIY 

The 2 set of tooling are detail in the official help page: https://dev.office.com/getting-started/addins 

I tried first the Visual Studio solution but I had some issue with the free version (get an error message telling me that I needed a non-free version to create t a plugin) so I decided to go with the option 2 “Other tools”. 

The other tool solution is a bundle of Web DEV tools: NodeJs and Yeoman. I already have NodeJs on my windows computer so I tried to use it but sadly face some issue due to my ENV (I’m also working on 2 other projects with nodejs specific setup: Meteor and Electron which tune the ENV for their needs).  

It starts to be frustrating at this point especially after the Google experience with the IDE online… luckily I found a very nice solution here: https://developer.microsoft.com/en-us/windows/downloads/virtual-machines 

Microsoft offer free windows VM that you can run on VirtualBox with a set of pre-install DEV tools “Start coding sooner with a virtual machine prepped for Windows 10 development. It has the latest versions of Windows, the developer tools, SDKs, and samples ready to go.”.  

That’s a very nice/smart move from MS and allow a quick DEV env setup without any impact on my windows ENV. The use of the VM is very smooth and this will probably be my default solution for any future DEV I do on windows! I strongly suggest to use it. 

Once the VM is started you can easily install all the tools needed on it. 

It may be important to explain here a big difference between a plugin for Google and MS. The google plugin was executed on Google side so we did not have to host anything. Microsoft took a different approach since the plugin will run on our side. It means that we will have to setup a WebServer (thus the bigger footprint of the DEV ENV for the MS plugin) to host the plugin.

Pre Code 

You may have already guess that MS office plugin is written in Javascript like the Google one. The documentation suggests to use Yeoman to kickstart the project. The generator is available here: https://github.com/OfficeDev/generator-office  

The documentation on the Office plugin page (link) is outdated: 
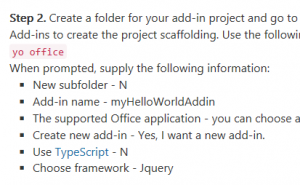
Better follow the readme which is more up to date. I did not keep the full command I use but it should be close to:

yo office name=cryptotracker host=excel framework=angular --js 

Then you can start the “empty” project with npm start and access the website. You may notice that the website offers by the plugin do not have a certificate. This prevent you to try it in office online. You need to generate a self-signed certificate and use it. This part was a nightmare! 

It is explain in both the official doc and the README of the generator with a dedicated page: https://github.com/OfficeDev/generator-office/blob/master/src/docs/ssl.md 

I followed all the instruction but it never worked. I spend hour investigating on my side thinking the issue was due to my import of the certificate in my brother until I find a ticket open in the project “Running add-in locally no longer works, certificate invalid” (see https://github.com/OfficeDev/generator-office/issues/244). I was so mad that the issue was known but not documented anywhere that I update the README to mention it with a PR (https://github.com/OfficeDev/generator-office/pull/249). I wasted so much time on this part…. Just look at the post to know how to generate the certificate and what to do with it. 

Once this painful step is done you should be able to see your plugin by opening the URL provided by the generator. 

User@WinDev1706Eval MINGW64 /c/Code/cryptocurrenciestracker/MicrosoftPlugin (master) 
$ npm start crypto-currencies-tracker@0.1.0 start C:\Code\cryptocurrenciestracker\MicrosoftPlugin 
> browser-sync start --config bsconfig.json 
[Browsersync] Access URLs: 
----------------------------------- 
       Local: https://localhost:3000 
    External: https://10.0.2.15:3000 
----------------------------------- 
          UI: http://localhost:3001 
UI External: http://10.0.2.15:3001 
----------------------------------- 
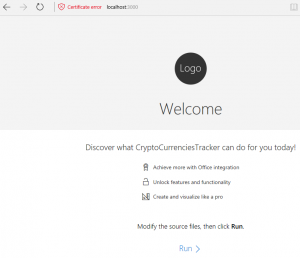
 

For the UI I decided to use ng-office-ui-fabric so it need to be install with:  

User@WinDev1706Eval MINGW64 /c/Code/cryptocurrenciestracker/MicrosoftPlugin (master) 
$ npm install ng-office-ui-fabric --save 
[Browsersync] Reloading Browsers... 
[Browsersync] Reloading Browsers... 
crypto-currencies-tracker@0.1.0 C:\Code\cryptocurrenciestracker\MicrosoftPlugin 
`-- ng-office-ui-fabric@0.15.3 
  +-- angular@1.6.4 
  `-- office-ui-fabric@2.6.3 

To be honest I was excepting it to be install by default since I selected “Angular” in the generator so I start a discussion about it: https://github.com/OfficeDev/generator-office/issues/250 

Code 

Now that the base code is ready we can start working on our plugin.  

Remember the google plugin? Just few lines of code to do some REST call and then annotate some JS function so that they can be used by the user as formula?  Bad news for us. It is way more complicated with Office! 

Retrieve the data (REST call) 

Let’s start with this part since it is the easiest. It is fairly easy since we just need to replace the google specific function by a standard “http.get”:  

$http.get(aUrl) 
   .then(function (response) { 
        var data = response.data; 
        console.log("Data received: ", data); 
        //var aResponseJson = JSON.parse(aResponseString); 
        var aValue = aProviderObj.parseResponse(data, iBinding._selectedPair); 
        console.log("aValue: ", aValue); 
        aBinding.setDataAsync(aValue, function (asyncResult) { }); 
    }); 

Here we delegate the URL creation and response parsing to each provider objects. Here is one of the provider as example:  

var aGdax = {}; 
  aGdax.name = "gdax"; 
  aGdax.url = "https://api.gdax.com/products/"; 
  aGdax.pair = { "BTCUSD": "BTC-USD", "ETHUSD": "ETH-USD" }; 
  aGdax.constructUrl = function (iCryptoPair) { 
    return aGdax.url + aGdax.pair[iCryptoPair] + "/ticker" 
  }; 
  aGdax.parseResponse = function (iJsonResponse, iCryptoPair) { 
    return iJsonResponse.price 
  }; 

This allow us to share more code between Office and Google plugins (the providers objects are the same and only the REST call functions are different). 

User formula 

For the Google plugin we added the annotation “* @customfunction” to make a JS function available to the user as a “formula”. I spend some time trying to see how to do the same with Office and it end up that it is not possible today. This functionality is currently the most wanted by developers as you can see on the office online improvement request: https://officespdev.uservoice.com/forums/224641-feature-requests-and-feedback/suggestions/6936956-add-user-defined-function-support-to-the-apps-for 
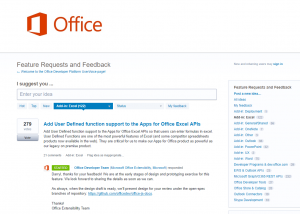
After some research the best alternative (update AUG2018: It now  exists: https://techcrunch.com/2018/05/07/microsoft-excel-gets-custom-javascript-functions-and-power-bi-visualizations/) I could found is to use “bindings”. It is an object part of the office plugin library that will bind a cell to a value. More info in the official doc: https://dev.office.com/reference/add-ins/excel/binding and this very good article that demonstrate how to use them (it help me a lot): https://msdn.microsoft.com/en-us/magazine/dn166930.aspx 

These bindings will allow us to keep track of certain cells and modify their content on the fly. This match our need but require more work that the Google version. 

To use these bindings, we need to associate a binding to some information to be able to update its content with a proper value. The information we need are the “exchange” and the “crypto” to track for this cell. We will thus create new object that hold together these information: 

  • Reference to a binding (which itself is a reference to a cell) 
  • Exchange to use 
  • Crypto currencies to track 

To create this object, we will allow the user to pick an exchange and crypto in the plugin menu and then click on a cell and bind all the info together. For example: (UniqId;”gemini”,”BTCUSD”). Then we will add a button to go through all the existing bindings in the sheet and refresh them all.  

This is done in the function createBindings: 

var uuid = $scope.uuidv4(); 
    var aNewBinding = { '_uuid': uuid, '_selectedExchange': $scope._selectedExchange, '_selectedPair': $scope._selectedPair }; 
    console.log('Creating a new binding: ', aNewBinding); 
    Office.context.document.bindings.addFromSelectionAsync( 
      Office.BindingType.Text, { id: uuid }, function (asyncResult) { 

These code sample will create a new binding in the document and keep track if this binding with the uuid in our object. The update of the binding is done in the function “updateBinding”: 

Office.context.document.bindings.getByIdAsync(iBinding._uuid, 
function (asyncResult) { 
if (asyncResult.status !== Office.AsyncResultStatus.Succeeded) { 
// TODO: Handle error 
console.log("Can not get the bindings - Deal with it"); 
} 
else { 
  var aBinding = asyncResult.value; 
  console.log("I have the binding: ", aBinding); 
  var aProviderObj = getProvider(iBinding._selectedExchange); 
  var aUrl = aProviderObj.constructUrl(iBinding._selectedPair); 
  console.log("Getting the value for exchange: " + iBinding._selectedExchange + " and pair: " + iBinding._selectedPair); 
  if (isKeyValidForProvider(iBinding._selectedPair, iBinding._selectedExchange) == false) { 
    throw new Error("Error - unknow iCryptoPair: " + iBinding._selectedPair + " for the provider: " + iBinding._selectedExchange); 
  } 
  $http.get(aUrl) 
    .then(function (response) { 
      var data = response.data; 
      console.log("Data received: ", data); 
      //var aResponseJson = JSON.parse(aResponseString); 
      var aValue = aProviderObj.parseResponse(data, iBinding._selectedPair); 
      console.log("aValue: ", aValue); 
      aBinding.setDataAsync(aValue, function (asyncResult) { }); 
    }); 
} 

The key here is that we retrieve the binding from the document using its unique ID and then use the info we have about it (exchange/crypto) to update its current value. 

I will not detail too much the layout creation (standard JS/HTML with the ngofficeuifabric plugin). You can still have a look at it in the plugin repo. 

Now we have a way to bind a cell to an exchange/crypto and update its value when the user presses a button. This is already some pretty good results but one thing is missing: Saving this information! 

Save 

The bindings are save by office in the document so we do not need to do anything about them. Nevertheless, we created new objects that associate these bindings with our plugin info (crypto/exchange/Ref binding). We need to save these data so that the user can access them again when the document is close/open. One solution would be to save them on the server side since we have to had a server for office plugin. I do not like this solution since it would lead to more work on our side and would preferer if we could “inject” our data in the document and let MS save it for us.  

Luckily this functionality is offered by office online plugin: https://dev.office.com/docs/add-ins/develop/persisting-add-in-state-and-settings 

The save operation is done in the “” function which is called everytime a new binding is created: 

var aCurrentBindings = Office.context.document.settings.get($scope._bindingsKeyInContext); 
    if (aCurrentBindings == null) { 
      // There are no bindings in the document. Creating a empty container 
      aCurrentBindings = []; 
    } 
    aCurrentBindings.push(aNewBinding); 
    console.log('aCurrentBindings', aCurrentBindings); 
    //Writting it back in the document context 
    Office.context.document.settings.set($scope._bindingsKeyInContext, aCurrentBindings); 
    //persist state 
    persistSettings(); 

Note that the “persistSettings()” is just calling “Office.context.document.settings.saveAsync” to ensure the data are persisted when the document is closed. 

Tests 

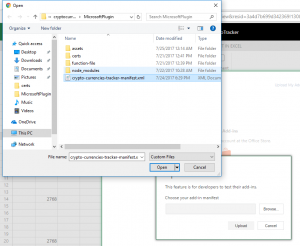
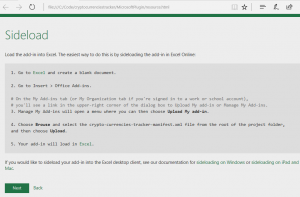
I did not do any automated tests for the office plugin. I just test it live in one spreadsheet. It is fairly easy to test the plugin with office online since it allows to upload a manifest on the fly. 
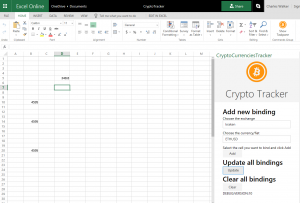
Here are the results after I add a new binding and refresh all the bindings. You can see that the BTC value double between the time I finish the plugin and the time I finish this article….which made me think that I should had some buy instead of spending my time doing Javascript 😉 

Publication  

I did not publish it require to host my application on a dedicated webserver. I do not want to pay for hosting and will not take time to update it.

Conclusion 

It was a really interesting experience to develop this plugin for the 2 biggest platforms. Both of them choose to use JS for the language with different approach. The Google way is simpler with the online IDE/Code hosting but maybe be more limited for complex project. Microsoft experience was more painful due to the time to setup all the environment and also it requires you to host your plugin. This is a big NOGO for me since I do not want to spend too much time on it and I think it explains why there are much more plugin for Google suite. I also think MS should listen to the developer community and work on the “User defined function” since it is currently the most request feature and offer by Google.

 

Google suite: Add on for Crypto currency tracker

I decided to create a plugin to retrieve the value of a cryptocurrency pair from Google Spreadsheet. I wanted to learn more about google spreadsheet plugin process and its internal. This was fairly enough and then I challenge myself to do the same for Microsoft Online Excel. This first article will explain the Google plugin creation with a focus on the whole flow and Developer experience. I will details/compare the Microsoft plugin creation in another article with again a focus on developer experience. 

IDE 

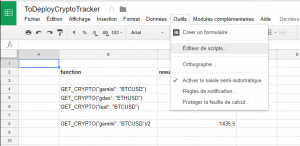
To create a plugin for a Google sheet you need to create a google sheet and then use its “script editor” section to write the plugin. It was a little surprising and I had to do some research to be sure I was properly understanding the process.  

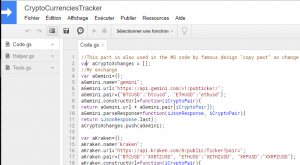
Once you click on “script editor” it opens a light online IDE 

This IDE allow you to write your code using Google Script language which is based on JavaScript. There are good resources on the language and its specific functions HERE

Code

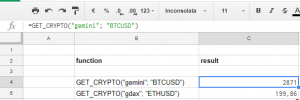
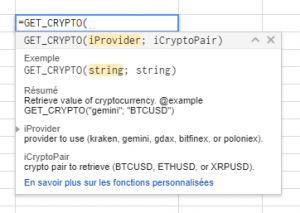
I wanted to add a function so that people can simply get the value of a crypto currency in the table. The idea I had in mind was something that look like: 

Luckily it is fairly simple to enhance the list of function in google sheet with the use of a special JSdoc keyword in the function documentation. This is clearly documented by google HERE thus, I will not detail it too much. Then I created several objects that represents various crypto currency exchange so that the user can choose which one he wants to use to retrieve the value. All these “exchange” object exposes various functions to create the URL to call and to decode the response. This design allows a main function to do the URL rest call and then let the “exchange” object parse the response. 

The biggest part of the code which include the “exchange” object and the custom function is done in the file code.gs available HERE

The code is pretty clear and well documented so I will not detail more. Maybe just a note on doing a REST call with Google script that use a specific function “UrlFetchApp.fetch” but once again pretty well documented HERE 

All the code is available on bitbucket HERE and fairly easy to follow.

Tests

Unit tests 

There are some Unit tests in the file Test.gs HERE 

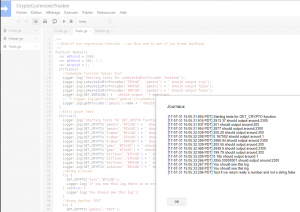
There are fairly rudimentary and just output the result of several call in the logs nevertheless it’s more than enough for the amount of code we had. The interesting info here is that you can run the test in the google IDE online and just check the log on the IDE 

Functional tests 

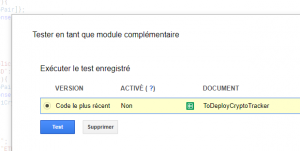
Google IDE allow you to test the plugin in a sheet by just clicking “Publish->Test as standalone plugin”. This will open a popup where you can select which version you want to test 

Once you click “test” it will open the same google spreadsheet that you used to create the script with your addon automatically loaded inside. It means that we can use your custom function to verify if it works 

Publication 

Once the plugin is ready it can be published on the Google chrome store. This was very confusing for me but it appears that google suite plugins are publish on the google chrome store (but it seems they are only visible when you browse the store from a google document). 

To publish you will need to register as a chrome developer and pay 5$. This was also surprising since I’m already register in the google play store but the 2 stores are completely decorrelated (even the publication flow are different). 

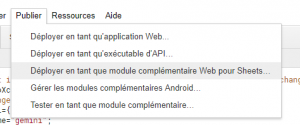
To publish on the store, you just click “publish->publish as sheet addon” 

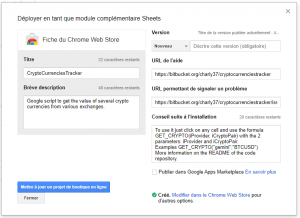
This will open a popup where you have to fill some information  

As you can see it mentioned the chrome store but no worry it will just be a sheet addon at the end. One important point is the checkbox “Publish in the app marketplace”. I have absolutely no idea what it means…. but I manage to publish my addon without checking the box. The first publication in the store will also ask you to fill another page of information (with some screen capture and other info). It is disturbing because the UI look different and seems to ask some info that you already enter in the popup. My guess is that the popup is only for the sheet add-on and then the other page is for all chrome store applications. It’s a little annoying and not very clear especially when you compare that to the process of publish an android application. There is also a manual process which make the first publication long (took me 3 days) but after that the app will be publish on the store: HERE 

Conclusion 

The process was easy thanks to the integrated IDE nevertheless the publication flow is strange (especially because it is different of what I was used too with the android store). The documentation is good although some part is unclear (the publication part… again). Code is very simple especially thanks to the very easy way to create new “custom functions”. 

The Microsoft plugin will be detailed in another article.

AcTricker

Im working in an openspace of 15 peoples and most of us are very cold. There is one thermostat for the whole openspace with the actual temperature display on it but it seems we cannot change the desired temperature… We complain several times to our management about it and after some time the responsible of the amenities comes and explains us the situation. The temperature is set by the landlord for the whole building and the sensor in our openspace is just to detect the temperature in our space to open air vent or not. In other word…there is nothing they can do about it, is it? 

This is the AcTricker! The solution to our problem 😉

It’s design to be put against the wall around the temperature sensor. It will create a cold micro climate around the sensor to trick it thinking that the office is cold and thus never start the AC in our openspace. It works with a Peltier device that generate cold inside the enclosure and Hot outside of the enclosure when a current is passing (I did not research how/why it is work but just use it as is).

The Peltier device is in sandwich with the hot face facing outside with a big heatsink/fan to dissipate the heat and the cold side facing in the enclosure with a smaller heatsink/fan. It is important to dissipate the heat/cold quickly otherwise the Peltier become inefficient. It would had been enough to stop here and the device would had been functional nevertheless I wanted to add more functionalities… 

The whole system is control with an android application with Bluetooth so people can check what is the simulated temperature inside the enclosure and act on it by stopping the Peltier device and fans. The brain of the whole system on the device side is an Arduino micro (small size). It is connected to a Bluetooth modem and a temperature/humidity sensor (DHT22/RHT03) for data exchange. There is also 2 MOSFET to control the fans and 1 static relay to control the Peltier device. 

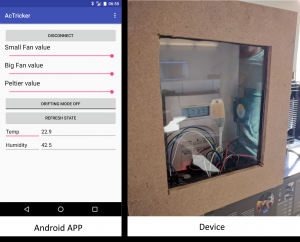
The android application allows to retrieve Temperature and Humidity and control the fans and Peltier. The application design is very similar to the one I created for previous project (like this one) and use the BT of android to communicate with the device so i will not details again here. The Arduino side is also very similar to previous projects (same one than the app). Here is the system after it is plug (android screen capture on the right and device on the left) :

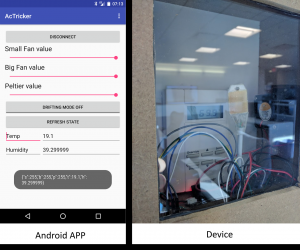
and the result 10 minutes after:

We reduce the temperature from 23 degrees Celsius to 19 degrees Celsius leading the AC to completely stop 😉

Code is on my bitbucket repo.

Improvement idea: Have the Arduino automatically stopping the Peltier/fan when the temperature inside is low enough to save power and reduce noise. 

Static Relay ??

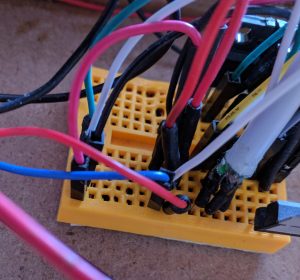
I used a static relay for the Peltier device after burning 2 MOSFETs when trying to control the Peltier with them. The MOSFET were becoming very hot very quick and even damage the breadboard as you can see on the picture

At the beginning, I was not sure why the MOSFET was becoming so hot. I know that the Peltier device use lot of current (around 7A) but the MOSFET I used (P16NF06FP) should had been OK since it was able to handle load up to 11A (I use the TO-220FP package which is plastic package and thus dissipate less heat than the metal package):

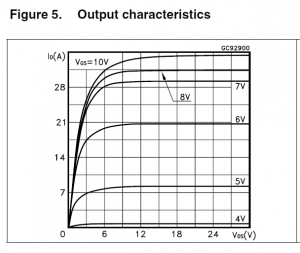
After some research (and particularly this blog post) I think the explanation is that the MOSFET was not able to handle 11A with my configuration. I was driving the MOSFET from the Arduino with a voltage of 5V but the MOSFET require more voltage to be fully open. I was thus not able to use the full MOSFET capability due to a gate voltage too low. The impact of the gate voltage (Vgs) on the possible current output (Id) is also in the datasheet:

As you can see if we switch the Gate voltage from 5V to the recommended 10V the current we can drain grow from 7A to more than 28A.

This is why the MOSFET was become too hot and unusable. I should have bought a MOSFET design to be driven with a gate voltage more compatible with Arduino like the IRL540.

DNS challenge for let’s encrypt SSL certificates

Last week I had to generate a SSL certificate for a domain which has its web server on a corporate network. The Web Server on the corporate network has outgoing internet access but cannot be reach from Internet. I was not sure it was possible to generate a certificate in this case with let’s encrypt since my previous experience was with a Web server reachable from internet to answer the let’s encrypt challenge (http://djynet.net/?p=821).

Luckily I was wrong 😉 It is indeed possible to prove let’s encrypt that you own the domain with a DNS challenge! Here are my notes on how to do it.

Download the client with:

wget https://dl.eff.org/certbot-auto
chmod a+x ./certbot-auto

Run the client in manual mode with DNS challenge and wait for the client to provide you the challenge

[root@vps99754 ~]# ./certbot-auto certonly --manual --preferred-challenges dns --email <your email> -d <the domain>

Saving debug log to /var/log/letsencrypt/letsencrypt.log

Obtaining a new certificate

Performing the following challenges:

dns-01 challenge for <the domain>

-------------------------------------------------------------------------------

NOTE: The IP of this machine will be publicly logged as having requested this

certificate. If you're running certbot in manual mode on a machine that is not

your server, please ensure you're okay with that.

Are you OK with your IP being logged?

-------------------------------------------------------------------------------

(Y)es/(N)o: Y

-------------------------------------------------------------------------------

Please deploy a DNS TXT record under the name

_acme-challenge. <the domain> with the following value:

bIwIxGg1IXXXXXXXXXXXXXXXXXXXXXXXXXXXXXX

Once this is deployed,

-------------------------------------------------------------------------------

Press Enter to Continue

At this point you just need to update your DNS with the entry provided as show in the following picture and press enter (maybe wait few seconds after you done the update if you use a webUI like me to update your DNS provider)

Waiting for verification...

Cleaning up challenges

Generating key (2048 bits): /etc/letsencrypt/keys/0000_key-certbot.pem

Creating CSR: /etc/letsencrypt/csr/0000_csr-certbot.pem

IMPORTANT NOTES:

 - Congratulations! Your certificate and chain have been saved at

   /etc/letsencrypt/live/<the domain>/fullchain.pem. Your cert will

   expire on 2017-07-23. To obtain a new or tweaked version of this

   certificate in the future, simply run certbot-auto again. To

   non-interactively renew *all* of your certificates, run

   "certbot-auto renew"

 - If you like Certbot, please consider supporting our work by:

   Donating to ISRG / Let's Encrypt:   https://letsencrypt.org/donate

   Donating to EFF:                    https://eff.org/donate-le

All set 😉 Pretty easy and very nice feature to validate a Webserver not connected to internet (as long as you have access to its DNS server and it is reachable from internet).

Quick note on Angular UI templates

I was recently looking for some dashboard framework to be used with a MEAN stack. Here are my notes:

GitHub: https://github.com/angular-dashboard-framework/angular-dashboard-framework
Note: No update in 2017

GitHub: https://github.com/start-angular/sb-admin-angular
Note: dead, no update in 2017, Port to angular of SB-admin2

GitHub: https://github.com/blackrockdigital/startbootstrap-sb-admin-2/
Note: not angular

GitHub: https://github.com/start-angular/ani-theme
Note: seems pay for angular version

GitHub: https://almsaeedstudio.com/themes/AdminLTE/index2.html
Note: non angluar template

Site: https://www.patternfly.org/
Note: Made by RH

GitHub: https://github.com/akveo/ng2-admin
Note: Not really UI. Package with NodeJS and not working with Express

Monarch, Remark, Slant, Fuse, Clip-Two, Make, Materil, Materia, Materialism, Maverick, Clean UI, Urban, Piluku, Avenxo, xenon, Angle, Metronic, square, slim, flatify, Triangular, ANGULR
Note: Not free

I did not find one that I like so I decided to have a look on lower level framework to design an UI myself:

GitHub: https://circlingthesun.github.io/angular-foundation-6/
Note: Based on fondation, Very similar to angularui

GitHub: http://ionicframework.com/
Note: More mobile oriented

Site: http://mobileangularui.com/
Note: More mobile oriented

GitHub: https://github.com/valor-software/ng2-bootstrap
Note: Same as AngularUI. Also based on bootstrap

Site: https://semantic-ui.com/
Note : Similar to AngularUI and FondationUI but based on another framework.

lumx
http://ui.lumapps.com/components/button

GitHub: https://github.com/uoziod/suave-ui
Note: seems very very light

prime ng
https://www.primefaces.org/primeng/#/dragdrop

Triangle Table

I wanted to do a prototype of the new table design I had in mind for some time. That was the good occasion to try a new CAD tool: onshape. Onshape is an online platform for CAD which has a free plan for hobbyist with all the functionalities available. The only limitation I see is that you cannot make private design (all your design are visible by anybody online). I tried various other free CAD tools in the past (and mainly used Openscad) but onshape offer much more functionalities than all the other. You should definitively give it a try : https://www.onshape.com/

It take some time to get familiar with onShape but they have a great community and some good tutorial on Youtube. Most of my time was spend understanding the Mate connector, Construction mode (very useful) and extruding with an angle. Here is the actual version

Then I decided to print the 2 tables and use some wood stick to do the feet and here is the result

Now I need how to do it real size. The real difficulties here is the positioning of the feet on the 2 tables which require precise angle.

I may design a PLA piece to do this join and keep wood for all the rest of the table. It was a good opportunity for me to test onshape and I would definitively recommend to anybody that do CAD.