Raspberry Pi and HID Omnikey 5321 CLI USB

I recently come across a project where I needed to interact with some RFID tag. I wanted to retrieve the Unique ID of the each badge. I had absolutely no information on the badge except the string “HID iClass” written on it.

I start doing some research and found out that there are 2 big frequencies used in RFID: 125 kHz and 13.56 MHz. The iClass seems mainly based on the 13.56 MHz standard so I decided to go for a reader on this frequency.

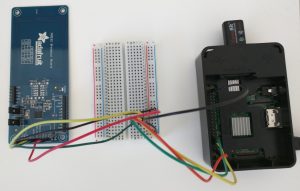
Then I found out that there are several standard on this frequency. The most used are (in order) ISO 14443A, ISO 14443B, and ISO 15693. Nevertheless the iClass type includes several tag variations with all these standards. Finally I decided to buy the ADA fruit reader which handles both ISO 14443A and B: https://www.adafruit.com/products/364

I set it up with a Raspberry Pi 2 and was able to read the TAG send with the reader but sadly not the tag I wanted to read… Since I was unable to read my tag I guess they are using the third protocol: ISO 15693.

I look for some reader for the ISO 15693 but the choice is very limited (since it is not widely use). In the meantime I found a cheap HID reader on amazon (https://www.hidglobal.fr/products/readers/omnikey/5321-cli) which should be compatible with HID iClass card so I decided to buy it.

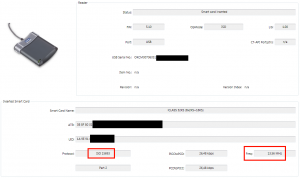
It works pretty well on Windows with their driver and software and gives me some useful information about my badge. It allowed me to confirm that it use the ISO 15693 standard:

It’s a good start nevertheless I wanted to use it on Raspberry Pi. I decided to do some research and found out that this type of RFID card reader is called “PCSC”:

PC/SC (short for “Personal Computer/Smart Card”) is a specification for smart-card integration into computing environments. (wikipedia)

Moreover there is a USB standard for such device: CCID.

CCID (chip card interface device) protocol is a USB protocol that allows a smartcard to be connected to a computer via a card reader using a standard USB interface (wikipedia)

Most USB-based readers are complying with a common USB-CCID specification and therefore are relying on the same driver (libccid under Linux) part of the MUSCLE project: https://pcsclite.alioth.debian.org/

There are plenty of soft related to RFID reading on Linux that I found during my research before choosing to try CCID. Here are my raw notes for future reference:

  • PCSC lite project
  • PCSC-tools
  • librfid
    • Seems dead
    • https://github.com/dpavlin/librfid
    • low-level RFID access library
    • This library intends to provide a reader and (as much as possible)
    • PICC / tag independent API for RFID applications
  • pcscd
  • libnfc
    • https://github.com/nfc-tools/libnfc
    • forum is dead
    • libnfc is the first libre low level NFC SDK and Programmers API
    • Platform independent Near Field Communication (NFC) library http://nfc-tools.org
    • libnfc seems to depend on libccid but it seems to depend on the hardware reader used :Note: If you want all libnfc hardware drivers, you will need to have libusb (library and headers) plus on *BSD and GNU/Linux systems, libpcsclite (library and headers).Because some dependencies (e.g. libusb and optional PCSC-Lite) are used
  • Opensc

I decided to go with the MUSCLE project available here: https://pcsclite.alioth.debian.org/ccid.html

After I installed the driver/daemon and the tools to interact with the reader I had trouble since the reader was not detected by pcscd. Luckily there is a section “Check reader’s compliance to CCID specification” on the pcsc page to know if the driver is supported. I follow it and send the repport to the main maintainer of pcsc driver: Ludovic Rousseau.

He confirms me that the driver was never tested with this driver and give me the instruction to try it :

Edit the file CCID/readers/supported_readers.txt and add the line:
0x076B:0x532A:5321 CLi USB
Then (re)install the CCID reader and try again to use the reader.
https://ludovicrousseau.blogspot.fr/2014/03/level-1-smart-card-support-on-gnulinux.html

I follow it and the reader gets detected by the daemon. Nevertheless the card is not detected so I provided more feedback/logs to Ludovic for debugging and sadly the result is that the reader cannot be supported:

The conclusion is that this reader is not CCID compliant. I am not surprised by this result.
You have to use the proprietary driver and no driver is provided for RaspberryPi.
If you are looking for a contactless reader have a look at https://pcsclite.alioth.debian.org/select_readers/?features=contactless

I will try to see if I can interact with the reader and libusb and also found a cheap open source ISO 15693 reader to continue this project.

Update 23JAN2017

I contact Omnikey to have support to use their reader for my project and they confirmed there is no driver on the Pi for it.

we don’t have any drivers for 5321 CLi on Raspberry Pi. Please have a look at OMNIKEY 5022 or OMNIKEY 5427 CK instead. The can be accessed through native ccidlib.

In the meantime I also bought another reader compatible with the ISO standard 15693: http://www.solutions-cubed.com/bm019/

I plug it with an Arduino Uno thanks to their blog article : http://blog.solutions-cubed.com/near-field-communication-nfc-with-the-arduino/

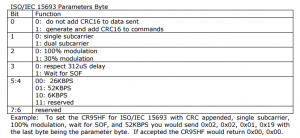
Nevertheless I was still unable to read the TAGS. I start doing deeper research and found that the ISO 15693 can have several settings and I do not know which one my iClass tags are using. I tried all the possible combinations that the BM019 handle:

Even with all the tests I made I’m still unable to read them. I dig deeper and found out that the BM019 module is built around the CR95HF ST chip. It seems that I’m not the only one trying to read Icalss with their IC and their support forum has several post explaining that it is not possible since iClass do not properly follow the ISO 15693 standard:

issue comes from Picopass which is not ISO 15693 complliant  ,
timing are not respected . 
We have already implemented a triccky commannd which allow us to support Picopass , a new version of CR95HF devevelopment softaware will be soon available including a dedicated window for PICOPASS .

After 3 readers and countless hours of attempt I’m still unable to read the iClass badges since they do not seems to implement any real standard.


Quick notes on setuping an Openshift cluster in Cloudforms

Just some quick notes on how to setup an Openshift cluster in Cloudforms.

Versions

[root@openshift-master ~]# oadm version
oadm v3.1.0.4-16-g112fcc4
kubernetes v1.1.0-origin-1107-g4c8e6f4
CF version : Nightly aug 2016

Openshift API

(mainly from https://access.redhat.com/webassets/avalon/d/Red_Hat_CloudForms-4.0-Managing_Providers-en-US/Red_Hat_CloudForms-4.0-Managing_Providers-en-US.pdf)

26JULY 2016 : It seems that most of the setup is already done in the OS Enterprise installation.

Project

Check if the project “management-infra” already exists with “oc get projects” command:

[root@openshift-master ~]# oc get projects
NAME               DISPLAY NAME   STATUS
default                           Active
management-infra                  Active
openshift                         Active
openshift-infra                   Active

if not, create it with (not tested):

oadm new-project management-infra --description="Management Infrastructure"

Service account

Check if the service account “management-admin” already exists with “oc get serviceaccounts” command :

[root@openshift-master ~]# oc get serviceaccounts
NAME               SECRETS   AGE
builder            3         1d
default            2         1d
deployer           2         1d
inspector-admin    3         1d
management-admin   2         1d

if not, create it with (not tested):

$ cat ServiceAccountIntegrationCloudFroms.json
{
  "apiVersion": "v1",
  "kind": "ServiceAccount",
  "metadata": {
    "name": "management-admin"
  }
}
$ oc create -f ServiceAccountIntegrationCloudFroms.json
serviceaccounts/robot

Cluster Role

check if the cluster role “management-infra-admin” already exists with “oc get ClusterRole” command:

[root@openshift-master ~]# oc get ClusterRole | grep management
management-infra-admin

if not, create it with (not tested):

$ cat ClusterRoleIntegrationCloudFroms.json
{
    "kind": "ClusterRole",
    "apiVersion": "v1",
    "metadata": {
        "name": "management-infra-admin",
        "creationTimestamp": null
    },
    "rules": [
        {
            "verbs": [
                "*"
            ],
            "attributeRestrictions": null,
            "apiGroups": null,
            "resources": [
                "pods/proxy"
            ]
        }
    ]
}
$ oc create -f ClusterRoleIntegrationCloudFroms.json

Policies

Create the following polocies to gice enough permission to your service account:

oadm policy add-role-to-user -n management-infra admin -z management-admin
oadm policy add-role-to-user -n management-infra managementinfra-admin -z management-admin
oadm policy add-cluster-role-to-user cluster-reader system:serviceaccount:management-infra:management-admin

Token name:

[root@openshift-master ~]# oc get -n management-infra sa/management-admin --template='{{range .secrets}}{{printf "%s\n" .name}}{{end}}'
management-admin-token-wbj84
management-admin-dockercfg-0sgjy

Token

[root@openshift-master ~]# oc get -n management-infra secrets management-admin-token-wbj84 --template='{{.data.token}}' | base64 -d
eyJhbGciOiJSUzI1NiIsInR5cCI6IkpXVCJ9.eyJpc3MiOiJrdWJlcm5ldGVzL3NlcnZpY2VhY2NvdW50Iiwia3ViZXJuZX..............ZQBxIaWooQ_kwDsmJNcZJx7DkraoOdbgcmc5W2JYXW-IySxAr5wyVZv5dVP406w

Then use this token in the CF UI in the default endpoint of the container setup.

Hawkular

Let’s encrypt TLS setup for nodejs

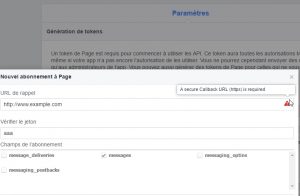
Following my first test to setup a HTTPS server to dialogue with facebook API describe in my previous article here I had error when trying to register the facebook webhook:

facebookCaError

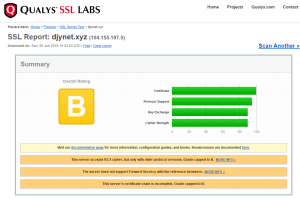
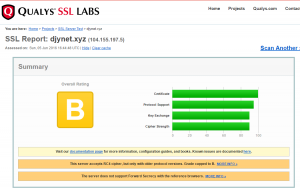
I dig deeper and also verified the domain certificate with https://www.ssllabs.com/ssltest :

sslcheckKo

It seems good but there is a warning about the certificate chain… I done some quick research and it seem to be the root cause. After some investigation (and mainly thanks to this post) it seems the error comes from my nodejs server setup and more particularly the missing certificate authority certificate info. I miss it since it is not used in the official documentation. It is indeed an optional parameter

If this is omitted several well-known “root” CAs will be used, like VeriSign

Let’s add it in the options:

var options = {
    key: fs.readFileSync('/etc/letsencrypt/live/djynet.xyz/privkey.pem'),
    cert: fs.readFileSync('/etc/letsencrypt/live/djynet.xyz/cert.pem'),
    ca: fs.readFileSync('/etc/letsencrypt/live/djynet.xyz/chain.pem')
};

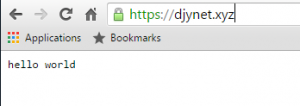
I done the ssl check another time and the error is now gone…. And the facebook webhook work fine too:

sslCheckOk

HTTPS with let’s encrypt

If you want to try the new facebook bot capability you could come across the need of an HTTPS webserver for the callback URL:

securecallback

Anyway….since https is becoming the standard (http://trends.builtwith.com/ssl/SSL-by-Default, https://security.googleblog.com/2014/08/https-as-ranking-signal_6.html) it could be interesting to learn more about it and give it a try…

Want to know more about https? Google!

Next step… you need a certificate. It needs to be provided by a certificate authority and it will cost you some money (depending on the authority and certificate type but once again…..google). You could buy one on rapidSSL for hundred dollars (https://www.rapidssl.com/) but since few weeks there is a new player in town provided free certificates: let’s encrypt.

“Let’s Encrypt is a free, automated, and open certificate authority (CA), run for the public’s benefit. Let’s Encrypt is a service provided by the Internet Security Research Group (ISRG).”

The service went out of beta in April 2016 with some limitation but the initiative is promising so I decided to try it.

The documentation is pretty good :

First you retrieved the client with

wget https://dl.eff.org/certbot-auto
chmod a+x ./certbot-auto

then you check the options

$ ./certbot-auto --help
Usage: certbot-auto [OPTIONS]
A self-updating wrapper script for the Certbot ACME client. When run, updates
to both this script and certbot will be downloaded and installed. After
ensuring you have the latest versions installed, certbot will be invoked with
all arguments you have provided.
Help for certbot itself cannot be provided until it is installed.
  --debug                                   attempt experimental installation
  -h, --help                                print this help
  -n, --non-interactive, --noninteractive   run without asking for user input
  --no-self-upgrade                         do not download updates
  --os-packages-only                        install OS dependencies and exit
  -v, --verbose                             provide more output

You need to find the plugin to use depending on your webserver (more info HERE). I used the standalone plugin since there is nothing for nodejs. With this plugin the client will use the port 443 to act as a webserver to handle some challenge to prove that its own the domain.

./certbot-auto certonly --standalone --email charles.walker.37@gmail.com -ddjynet.xyz

The output will give you information about where the certificat/key have been generated so you can use them :

Congratulations! Your certificate and chain have been saved at
   /etc/letsencrypt/live/djynet.xyz/fullchain.pem......

Then we can try it with a simple page served by nodejs.

Here is a very simple https nodejs server (from the official doc : https://nodejs.org/api/https.html)

var fs = require('fs');
 var https = require('https');
 var options = {
 key: fs.readFileSync('/etc/letsencrypt/live/djynet.xyz/privkey.pem'),
 cert: fs.readFileSync('/etc/letsencrypt/live/djynet.xyz/cert.pem')
 };
 https.createServer(options, function (req, res) {
 console.log(new Date()+' '+
 req.connection.remoteAddress+' '+
 req.method+' '+req.url);
 res.writeHead(200);
 res.end("hello world\n");
 }).listen(443,"0.0.0.0");

Let’s run it with

$ sudo node main.js
 Fri Jun 03 2016 02:41:57 GMT+0000 (UTC) 73.68.66.138 GET /
 Fri Jun 03 2016 02:41:57 GMT+0000 (UTC) 73.68.66.138 GET /favicon.ico

And check the result

sslResult

Nice green lock… we’re safe !

Warning!

I discover few days after that it was node 100% working. The nodejs server does not provide the chain of certificate. See my follow up article to fix it HERE.

Determine file system type

It will avoid me to stackoverflow it every time…

[myuser@myserver ~]$ df -T
Filesystem     Type     1K-blocks    Used Available Use% Mounted on
/dev/sda1      xfs       10473900 2185416   8288484  21% /
...
/dev/sdb1      xfs      209611780  315256 209296524   1% /ephemeral

Works fine unless the FS is not yet mounted…. Otherwise use “file”:

[myuser@myserver ~]$ sudo file -sL /dev/sdb1
/dev/sdb1: SGI XFS filesystem data (blksz 4096, inosz 256, v2 dirs)

Openshift installation on GCE using terraform

I wanted to try to install openshift on a GCE cluster with the official “ansible installer” available on github https://github.com/openshift/openshift-ansible. Nevertheless I did not manage to have the installer creating the VM on GCE and I’m not even sure it is possible (even if it seems based on libcloud). In the meantime I discover Terraform which allow describing an infrastructure in a common language and deploying it on multiple cloud (including GCE and AWS).

Finally I decided to work on a project that will include these 2 topics “Openshift installation with ansible” and “infrastructure creation with terrafrom”.
I did not had to search too long before I found an open source project that aim to do that:
https://github.com/christian-posta/openshift-terraform-ansible

“This repo contains Ansible and terraform scripts for installing openshift onto OpenStack or AWS EC2.

The repo is organized into the different deployment models. Currently tested with EC2 and OpenStack, but can be extended to Google Compute, Digital Ocean, etc. Happy to take pull requests for additional infrastructure.”

That was perfect since I wanted to use GCE. I decided to contribute to this project by adding the GCE support.

Here is an overview of the whole process (more detail on the github project) :

  1. Used Terrafrom to create the VMs cluster on the cloud
    this is based on an Infrastructure file and Terrafrom.
  2. Use Ansible to customize the VMs
    this part use Ansible and an external Opensource project made by cisco to create dynamically a Ansible Inventory file from the Terrafrom files: https://github.com/CiscoCloud/terraform.py. This is not obvious today since the Cisco code is copied in the repo (see my comment later)
  3. Use the Openshift-Ansible installer to install Openshift on these VMs
    This part use the official installer but require a manual action first to create the ansible inventory file.

Remove static “Terraform.py” script

During my changes on the repo I noticed that it was relying on an Cisco project to create an Ansible inventory from the Terrafrom files. Nevertheless instead of cloning the cisco repo (like it is done for Openshift-Ansible Repo) it was committed.
I think it was done like this since the original creator was thinking to modify it later on but for now it prevent us to benefit from the changes done on the official github repository of Cisco. This is particularly true for my usecase since there was a bug preventing to create the inventory file for GCE in the actual version (but fix on the github last versions).
I thus decided first to create a PR to clone the Cisco repo in the procedure and remove the old version which was committed.

https://github.com/christian-posta/openshift-terraform-ansible/pull/1

GCE Terrafrom integration

todo

Artifactory cache (no root/no internet)

Artifactory is a repository manager. It is the one used in my current company to store various packages like RPM/Puppet/Pypi/Vagrant… You can find more documentation on their website:
https://www.jfrog.com/open-source/

This post gathers my note to install an artifactory cache connected to another instance (master instance) to speed up the package retrieval. This procedure is used on a target server where you have no internet connection and no root access.

0/Download

Download Java + Artifactory free on a computer with internet access (or from Artifactory) and transfer them on the target server.

1/Untar/unpack

unzip jfrog-artifactory-oss-4.5.2.zip
tar zxvf jre-8u73-linux-x64.gz

2/Java install

export PATH=/home/sbox/jre1.8.0_73/bin:$PATH
export JAVA_HOME=/home/sbox/jre1.8.0_73

3/Artifactory install

nohup ./bin/artifactory.sh &

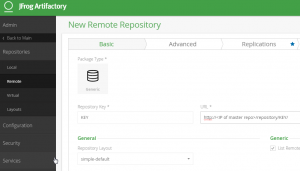
4/Add the link to Master repo (to act as cache)

Use the admin UI on port 8080 :

ArtifactoryCache

Be careful when choosing the KEY. I strongly suggest to use the name of the remote repo you want to cache locally otherwise you will have different URL to download from depending on if you want to download from the MASTER or this CACHE.

5/Test it

Curl http://www.<target server IP>/repository/KEY/<stuff>

Stuff is an artifact that should exist on the MASTER artifactory otherwise it will fails…

Electric Train V3

Feel free to have a look on the V2 first:
http://djynet.net/?p=759

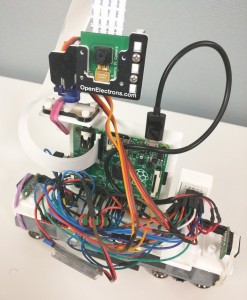
The biggest change is in the camera able to follow the phone orientation to update its angle. I also replace the front/rear sensors.

TrainV3

Camera tracking

I used the html5 API to detect the phone orientation:

if (window.DeviceOrientationEvent) {
  // Our browser supports DeviceOrientation
  window.addEventListener("deviceorientation", deviceOrientationListener);
} else {
  console.log("Sorry, your browser doesn't support Device Orientation");
}
function deviceOrientationListener(event) {
  var c = document.getElementById("myCanvas");
  var ctx = c.getContext("2d");

  ctx.clearRect(0, 0, c.width, c.height);
  ctx.fillStyle = "#FF7777";
  ctx.font = "14px Verdana";
  ctx.fillText("Alpha: " + Math.round(event.alpha), 10, 20);
  ctx.beginPath();
  ctx.moveTo(180, 75);
  ctx.lineTo(210, 75);
  ctx.arc(180, 75, 60, 0, event.alpha * Math.PI / 180);
  ctx.fill();

  ctx.fillStyle = "#FF6600";
  ctx.fillText("Beta: " + Math.round(event.beta), 10, 140);
  ctx.beginPath();
  ctx.fillRect(180, 150, event.beta, 90);

  ctx.fillStyle = "#FF0000";
  ctx.fillText("Gamma: " + Math.round(event.gamma), 10, 270);
  ctx.beginPath();
  ctx.fillRect(90, 340, 180, event.gamma);
  
  var aMsg = event.alpha.toString()+"_"+event.beta.toString()+"_"+event.gamma.toString();
  console.log("aMsg" + aMsg);
  doSend(aMsg);
}

Which send the 3 orientation information to the Tornado python server running on the Raspberry pi of the train. First I was doing JSON REST call to send the string containing the information but it was too slow to have the camera moving in real time. This was the perfect opportunity to use websocket for more real time communication.


function onOpen(evt) { 
        console.log("CONNECTED");
        doSend("Hi there!");
    }
    function onClose(evt) { 
        console.log("DISCONNECTED");
    }
    function onMessage(evt) { 
        console.log('message: ' + evt.data);
    }
    function onError(evt) { 
        writeToScreen('error' + evt.data);
    }
    function doSend(message) { 
        websocket.send(message);
    }
function testWebSocket() {
        websocket.onopen = function(evt) { onOpen(evt) };
        websocket.onclose = function(evt) { onClose(evt) };
        websocket.onmessage = function(evt) { onMessage(evt) };
        websocket.onerror = function(evt) { onError(evt) };
}
        

if (!'WebSocket' in window){
    console.log("Sorry, your browser doesn't support Websockets");
} else {
var wsUri = "ws://192.168.10.1:80/ws";
var websocket = new WebSocket(wsUri);
    testWebSocket();
}

Which is received on the server side and put in a variable (see the class Handler_WS) :

    def on_message(self, iMessage):
        """Methode call when the server receive a message"""
        logging.info('Receive incoming message:'+str(iMessage))
        #self.write_message("toto")
        self.aTrainRef._cellAngles=str(iMessage)

This variable is then read every 125ms by the “foo” function:

tornado.ioloop.PeriodicCallback(lambda: foo(aTrain), 125).start()

At the end the real method called is in charge of updating the turret position. The whole stuff is based on an existing framework called servoBlaster which will take care of driving the Servo.

def updateTurretFromScreenAngle(self):
        if (self._cellAngles!=""):
            #Update Gamma
            aGamma = self._cellAngles.split("_")[2]
            aGammaF = float(aGamma)
            aGammaI = int(aGammaF)
            aGammaisNegative = False
            if (aGammaI<0): aGammaI=(aGammaI*-1)-40 aGammaisNegative = True else: aGammaI=140-aGammaI if ((aGammaI>0)and(aGammaI<100)):
                self._turretHeight = 100 - aGammaI
                self.sendPos(ConstModule.CONST_SERVO_HEIGHT,self._turretHeight)
            #Update Alpha
            ...

Servo Blaster is library able to drive Servo on the Raspberry pi using software PWM. It is pretty hard to do since the Pi is not running a real-time OS. It relies on very low level interruption to ensure the timing needed to have a proper PWM are respected. You can have more info on it here:

https://github.com/richardghirst/PiBits/tree/master/ServoBlaster

It basically start a daemon (which I added in the crontab to be launch at boot time) on which you can interact with writing the desired position of each servo in /dev/servoblaster like:

echo 3=120 > /dev/servoblaster 

I also used servo blaster to send PWM info to the motor driver to change the train speed (since this functionality was broken when I moved from Arduino to Rapsberry Pi).

Contact sensors

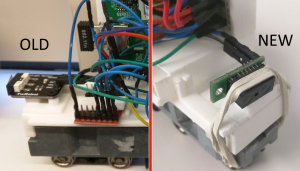
I replace the old contact sensor by some new sensor able to detect an incoming obstacle before impact.

TrainSensorNew

They are still binary sensors that will turn high if they detect an obstacle but they have a wider range between 2 and 10 centimeters. This allows the train to detect incoming obstacle and stop before hitting it. The sensor is available on ADAfruit:
https://www.adafruit.com/products/1927

Demo

I made some videos on this new version on YouTube:

Code

As always the code is available here:
https://bitbucket.org/charly37/train/overview

Electric train V2

Following the first version of the electric train : http://djynet.net/?p=731

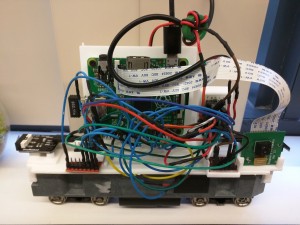
After some weeks of works I’m proud to announce the Version 2 of the electric train:

TrainV2

Wifi capabilities

The train can now be control with Wifi. It creates a wifi hotspot at boot time allowing people to connect to access a UI with some commands. The Wifi hotspot creation is describe HERE

Web

The train now offers a Web UI which allows controlling it and seeing the camera broadcast. The UI is done in Angular JS (with Bootsrap Angular UI). The Web server used to render the page is a python one : Tornado.

In addition of the UI it offers REST API to control the train (which are called today by the UI but could be used for a native Android application). The Web creation setup is detail HERE (TODO).

Embedded camera

The train is now equipped with a camera (the official Raspberry camera). The camera stream is broadcast and available on the train Web UI. The camera broadcast setup is describe HERE

Raspberry Pi brain

I replace the Arduino board with a Raspberry Pi A+. This extra boost of power was needed to broadcast the camera stream and create a wifi hotspot.

UBEC Power source

The biggest surprise I had when creating the new version was lot of unexpected Raspberry Pi reboot. Every time I was starting to move the train the Raspberry Pi was rebooting. I quickly suspect it was due to the motor which either took too much current or create perturbation that the 7805 cannot handle by itself. I done some research to understand how this issue was usually handle in R/C world and find out that they already have the perfect solution : BEC.

It is used to power the command part of the RC model from the same source than the motor. It provides a smooth tension and is able to absorb the impact of the motors on the power source with use of self and capacitor (wikipedia link). Since it is standard component in R/C world you can buy them pretty easily on the Web :

UBEC

The final result is visible in this video : TODO