Android Studio 0.8.14 – missing SKD

I just had a new PC so I needed to reinstall Android Studio to do some Android DEV. I already install it several time previously but face an issue in the last version (0.8.14) available on the official website : https://developer.android.com/sdk/installing/studio.html

The download link mentioned that the SDK is part of the download package:

Androidpackage

The install page also details the procedure :

installAndroidStudio

Both of these 2 sources lead to think that the SDK is part of the installer…which in no longer the case since 0.8.14. So if you try to follow this procedure Android studio will not start properly (it will ask you for the SDK). I thought there was something wrong with my install and lost too much time investigating what could be wrong. I tried to run it as admin or other trick found on SO…..this is completely useless !

If you have the same error it is in fact completely normal ! Since 0.8.14 the SDK is no longer part of the DL and you have to install it yourself. The documentation is not up to date which is very confusing but the information is available on some place but hard to find. You will have it on the “recent change” page on the beta side channel available here : http://tools.android.com/recent/androidstudio0814inbetachannel

AndroidNoSdk

So in case you have the same issue…..don’t spend time on useless investigation and just install the SDK yourself ! I hope it will help people until google update the info on the official install doc.


Android 0.8 Beta – INSTALL_FAILED_OLDER_SDK

I updated my android studio to the last version 0.8.2. Since this update it is no longer possible to have my APP runing on my phone.

Everytime I tried to upload it to the phone I have the following error :
INSTALL_FAILED_OLDER_SDK

I tried a fresh install too leading to the same issue. After some googling it seems the issue impact lot of people :

  • http://stackoverflow.com/questions/24465289/android-studio-failure-install-failed-older-sdk
  • http://stackoverflow.com/questions/24469754/failure-install-failed-older-sdk-in-android-studio
  • https://code.google.com/p/android/issues/detail?id=72840
  • http://blog.csdn.net/hotlinhao/article/details/37498201
  • ….

I m not interested in the last API of Android L since my phone is only 4.3 nevertheless even by specifiying that I want to be using 4.3 the build didn’t take it into account. The solution I found is to remove all Android L SDK/Compiler from  the SDK manager and install android 4.3 (and/or 4.4)

Android4-3bug

and then restart android. After that the SDK selection will works fine and if you create a new project you should have the following gradle file.

gradleXml

Now the upload to the phone works fine 😉

Ajout librarie android studio

Ajout de la lib “guava” a un projet dans android studio en 3 étapes :

1/ Copier le fichier “guava-14.0.1.jar” present dans le repertoire d’installation d android studio “C:\Dev\Android\android-studio\lib” vers le repertoire “lib” du projet courant “C:\Users\charles\AndroidStudioProjects\VoiceRecognition\VoiceRecognition\libs”

2/ Ajouter en tant que library (clique droite sur la library) :

222

3/ Ajouter la lib dans le fichier de dep de graddle :

333

Ensuite ca devrait compiler (sinon il faut faire un clean project)

Installation Android Studio Ubuntu

1/JDK

La premiere etape est l’installation du JDK disponible ici. Il faut choisir la version Linux x64 : jdk-7u21-linux-x64.tar.gz.Une fois que la version est DL il faut le decompresser et le copier :

tar xzvf ~/Downloads/jdk-7u21-linux-x64.tar.gz
mv jdk1.7.0_21/ /usr/lib/jvm/

finalement il reste juste a mettre a jour l environement avec au choix des “export dans le wshenv/profile” ou alors avec “update alternative” :

sudo update-alternatives --install /usr/bin/java java /usr/lib/jvm/jdk1.7.0_21/bin/java 1
sudo update-alternatives --install /usr/bin/javac javac /usr/lib/jvm/jdk1.7.0_21/bin/javac 1
sudo update-alternatives --install /usr/bin/javaws javaws /usr/lib/jvm/jdk1.7.0_21/bin/javaws 1
sudo update-alternatives --config java
sudo update-alternatives --config javaws
On peux verifier que tout a ete installe correctement avec :

charles@charles-Fixe:~/Téléchargements$ java -version
java version "1.7.0_21"
Java(TM) SE Runtime Environment (build 1.7.0_21-b11)
Java HotSpot(TM) 64-Bit Server VM (build 23.21-b01, mixed mode)
2/ Android studio
Comme pour le SDK….on commence par le DL ici. Ensuite on le decompresse
tar xvzf android-studio-bundle-130.677228-linux.tgz
et on peux le lancer
cd android-studio/bin
charles@charles-Fixe:~/DEV/android-studio/bin$ ./studio.sh
Capture du 2013-05-26 21:55:24

Creation application android pour remplacer « Tasker + Autovoice » – P1

Le but de cet article est de créer une application native android pour remplacer « tasker + autovoice » que j’utilise actuellement pour envoyer des commandes vocales a mon serveur domotique. Le duo « Tasker + Autovoice » marche plutot bien mais je souhaite qq chose d’integrer dans mon framework et surtout de pouvoir le personnaliser un peu plus. En plus je pourrai tester la nouvel IDE de Google pour le DEV android : Android Studio.

android_studio_medium

Android studio est un IDE Android créée par Google et présenté a la communauté lors des Google I/O de mai 2013. Ce nouvel IDE est en version « beta » et peut être une option intéressante en plus du classique « Eclipse + SDK + Plugin ».

Android Studio est telechargable ICI

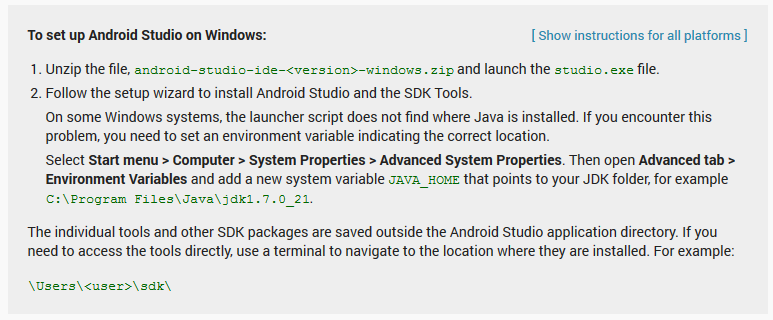
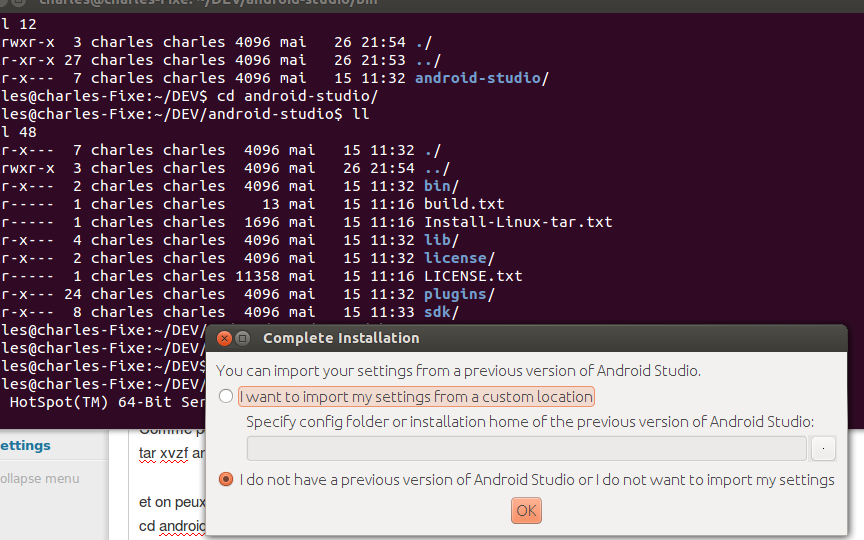
Les instructions pour l’installation sont sur la meme page et celle ci est assez facile (comparativement a eclipse + plugins) puisque tout est integre. Une seul remarque importante….si le logiciel ne se lance pas apres l instalation lisez ca :

Known issue: On some Windows systems, the launcher script does not find where Java is installed. If you encounter this problem, you need to set an environment variable indicating the correct location.
Select Start menu > Computer > System Properties > Advanced System Properties. Then open Advanced tab > Environment Variables and add a new system variable JAVA_HOME that points to your JDK folder, for example C:\Program Files\Java\jdk1.7.0_21.

Une fois que tous est installe et que l’application fonctionne on doit avoir un display qui ressemble a ca :

1

Ensuite on va installer le driver du samsung galaxy note 2 pour pouvoir installer nos programme sur ce dernier. Cet operation est explique ICI et ICI

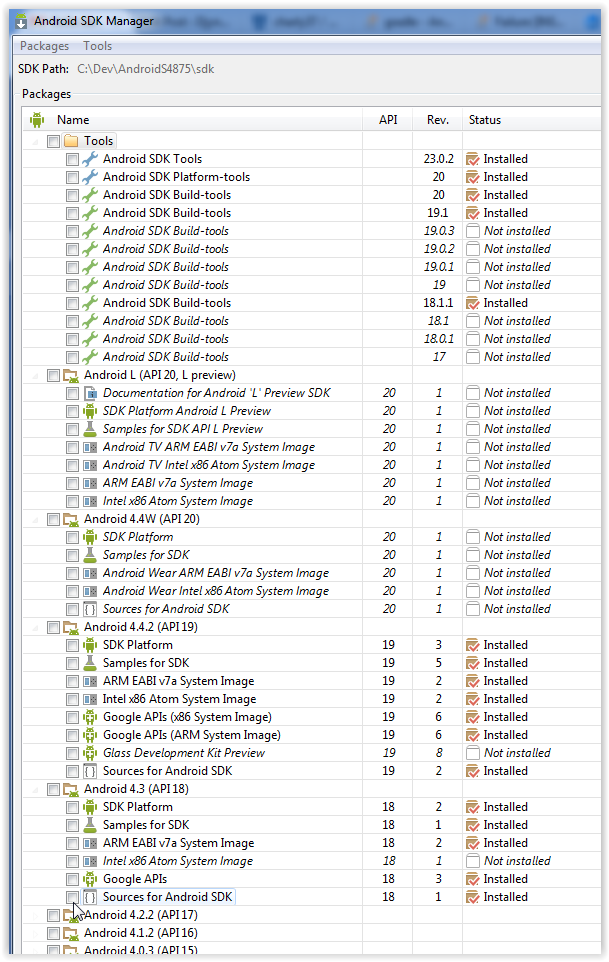
J’ai eut un peu de mal parce que je pense qu il manque quelques étapes/explication donc je détail un peu plus. La première chose a faire est d’installer le drivers pour la communication Galaxy-PC. Pour cela il faut aller dans la gestion du SDK « SDK android manager »depuis l’application et dans la partie « Extras » coche « Google USB Driver » et de cliquer sur « instal packages ».

2

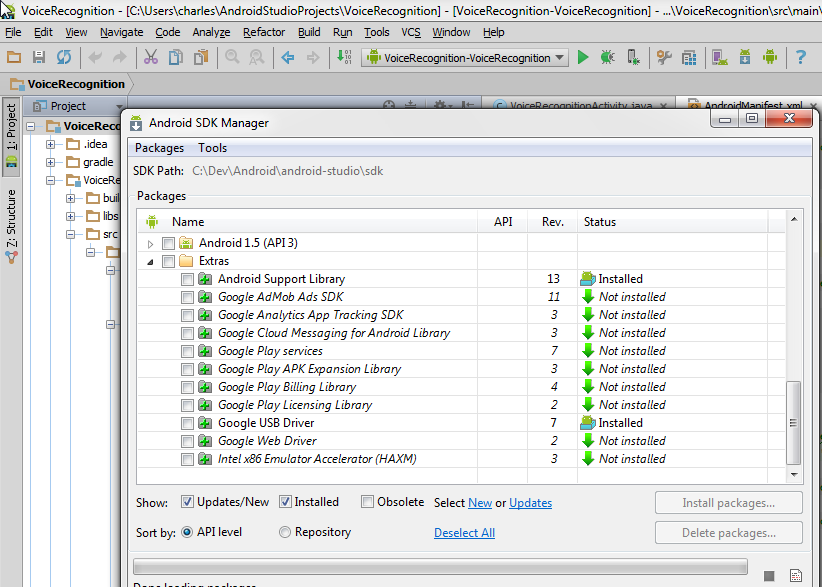
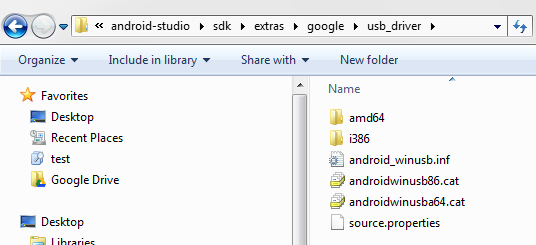
Grace a cet operation le driver serva ensuite present dans le folder « <sdk>\extras\google\usb_driver\ «

3

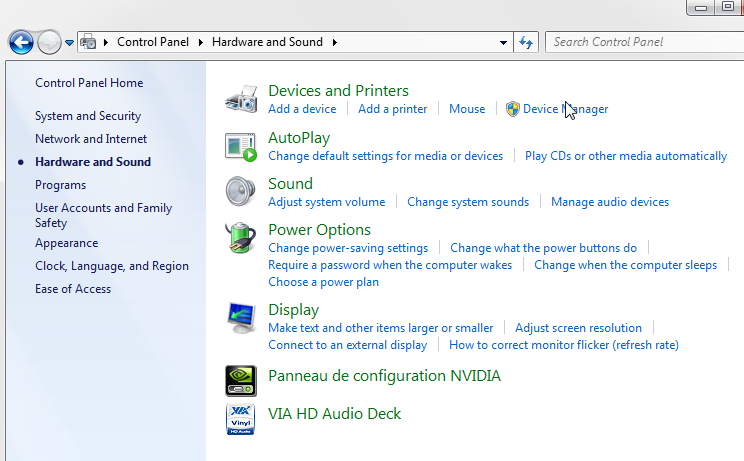
Maintenant que le driver est present sur le disque on peut l’utiliser. Il faut ouvrir le « device manager » de windows. Le « Device manager » peut etre lancer depuis le « control panel → System and security → System »

7

Ensuite dans le device manager il y a le tel android dans “other” :

g1

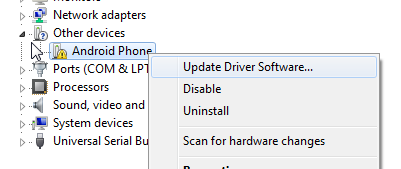
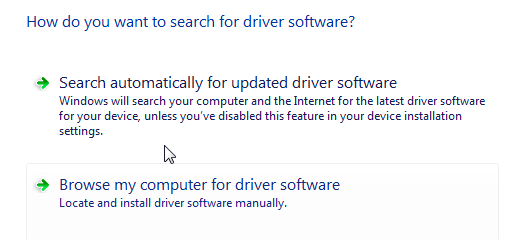
il faut cliquer sur “update driver” pour le forcer a utiliser le driver qu on a instale juste avant. Ensuite on precise qu on a le driver en choissisant “browse my computer…”

j2

Ensuite il faut faire attention a choisir “Let me pick a list of device….” :

j5

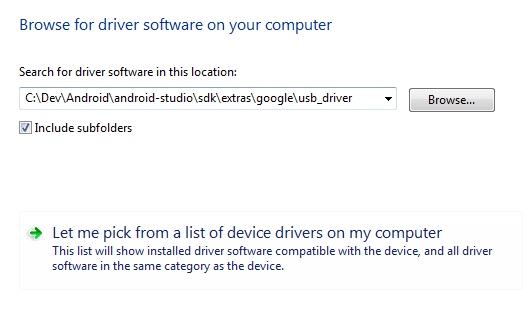
Ensuite il faut cliquer sur le bouton “have disk” et donner le lien vers le path ou est le driver (dans le repertoire du SDK)

h1

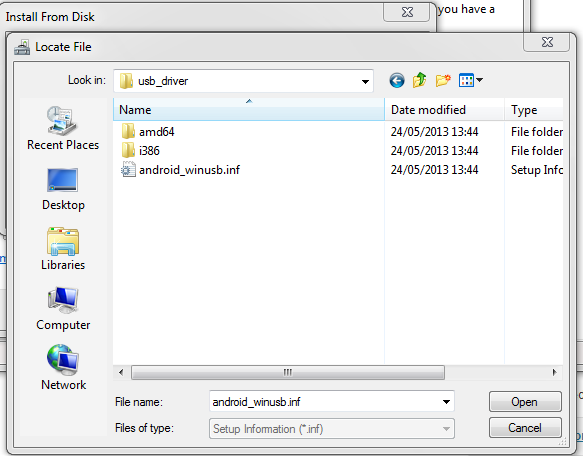
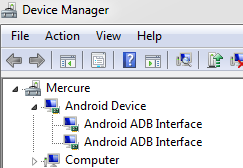
et enfin windows propose plusieurs choix. Il faut prendre “Android ADB interface”

tt

Windows risque de vous dire que le driver est pas compatible mais il suffit de faire “oui” a la question “installer quand meme”. Si tout se passe bien le device sera enfin visible dans le device manager comme ci dessous :

tyy

Pour etre sure que l’installation on peut verifier la liste des devices attache avec un utilitaire du SDK android disponible dans le repertoire “android-studio\sdk\platform-tools” : adb.exe. Pour ca on utilise l’invite de commande windows et on lance “adb devices” :

fin

Voila 😉 le device est connecte et peut etre utilise dans “android studio”