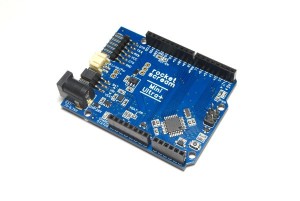
Cela fait longtemps que je cherche une carte Arduino qui consomme le minimum de courant pour pouvoir la mettre dehors sur batterie…. A force de chercher j’ai trouve une carte spécialement conçue dans cette optique : Rocket scream Mini Ultra +. La carte est disponible en ligne ICI.
J’ai décidé de la tester avec un petit programme qui fait clignoter une led. Pour avoir un point de référence j’ai uploader le programme sur une arduino leonardo et sur la MiniUltra+.
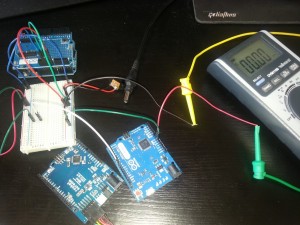
Voila la consommation des 2 cartes :
Arduino Leonardo : 48.4 mA
Rocket scream Mini Ultra + : 6.7 mA
La carte consomme 7 fois moins que l’Arduino Leonardo ! Je vais lui ajouter un module Xbee avec un mode sleep et refaire des mesures 😉
Update du 9 Mai :
Si on ajoute un module Xbee la consommation passe de 6.7 mA a 45 mA (ce qui correspond a la datasheet Xbee +40mA). J’ajoute aussi un capteur de lumière qui permettra au système domotique de savoir quand il faut fermer les volets ;). On a donc une consommation de 45 mA…..encore un peu trop a mon gout !
L’étape suivante est de faire dormir le module Xbee en utilisant la broche “DTR” du module. Il faut la mettre a l’état haut pour faire dormir le module et donc diminuer sa consommation (il faut aussi que le module soit configurer en sleep mode PIN). Je fais donc “dormir” le module 5 min puis ensuite l’Arduino allume le module et envoie la valeur de la luminosité. Voila le code :
//Libraries definitions
//Xbee library
#include
//Deipara library
#include

//pin guirlande led
const int _OutDebugLed = 8;
const int _OutXbeeWakeUp = 7;
const int _InLightPin = 4;

//Xbee objects
//create Xbee object to control a Xbee
XBee _Xbee = XBee();
//Create reusable response objects for responses we expect to handle
ZBRxResponse _ZbRxResp = ZBRxResponse();
//Global variable used in the program
int _CmdReceived = 0;
int _DataToSend = 0;

void setup()
{
  // start serial
  _Xbee.begin(XBEE_SPEED);
  Serial.begin(XBEE_SPEED);
  //defined IO
  pinMode(_OutDebugLed, OUTPUT);
  pinMode(_OutXbeeWakeUp, OUTPUT);
  pinMode(_InLightPin, INPUT);

  digitalWrite(_OutDebugLed, LOW);

  delay(2000);
}

void loop()
{
  //digitalWrite(_OutDebugLed, HIGH);
  digitalWrite(_OutXbeeWakeUp, LOW);
  delay(5000);
  unsigned int val = analogRead(_InLightPin);    // read the input pin
  sendZigBeeMsg2(_Xbee,36,val,COORD_ADDR);
  //digitalWrite(_OutDebugLed, LOW);
  digitalWrite(_OutXbeeWakeUp, HIGH);
  delay(300000);

}
En utilisant ce code la consommation passe de 45 mA a 7mA (avec un petit pic a 30mA toutes les 5 minutes) ! Une dernière optimisation est de faire dormir le micro en plus du module Xbee. Je me suis inspire d’un article dispo ICI. Il s’agit d’utiliser le WatchDog pour réveiller le micro toutes les 8s (on ne peut pas faire plus) et attendre d’avoir fait ça pendant 5 minutes pour ensuite faire le vrai processus. Voila le code :
//Xbee library
#include <XBee.h>
//Deipara library
#include <Deipara.h>
// This library contains functions to set various low-power states for the ATmega328
#include <avr/sleep.h>

// This variable is made volatile because it is changed inside an interrupt function
// Keep track of how many sleep cycles have been completed.
volatile int sleep_count = 0;
// 75 loop needed since ze sleep for 8s and want to wait 10 minutes
const int sleep_total = 75;

//pin
const int _OutDebugLed = 8;
const int _InLightPin = 4;
const int _OutXbeeWakeUp = 7;

//Xbee objects
//create Xbee object to control a Xbee
XBee _Xbee = XBee();
//Create reusable response objects for responses we expect to handle
ZBRxResponse _ZbRxResp = ZBRxResponse();
//Global variable used in the program
int _CmdReceived = 0;
int _DataToSend = 0;

void goToSleep()
{
  // The ATmega328 has five different sleep states.
  // See the ATmega 328 datasheet for more information.
  // SLEEP_MODE_IDLE -the least power savings
  // SLEEP_MODE_ADC
  // SLEEP_MODE_PWR_SAVE
  // SLEEP_MODE_STANDBY
  // SLEEP_MODE_PWR_DOWN -the most power savings
  // I am using the deepest sleep mode from which a
  // watchdog timer interrupt can wake the ATMega328
  //digitalWrite(_OutDebugLed, HIGH);

  set_sleep_mode(SLEEP_MODE_PWR_DOWN); // Set sleep mode.
  sleep_enable(); // Enable sleep mode.
  sleep_mode(); // Enter sleep mode.
  // After waking from watchdog interrupt the code continues
  // to execute from this point.

  sleep_disable(); // Disable sleep mode after waking.
  //digitalWrite(_OutDebugLed, LOW);
}

void watchdogOn()
{
  // Clear the reset flag, the WDRF bit (bit 3) of MCUSR.
  MCUSR = MCUSR & B11110111;

  // Set the WDCE bit (bit 4) and the WDE bit (bit 3)
  // of WDTCSR. The WDCE bit must be set in order to
  // change WDE or the watchdog prescalers. Setting the
  // WDCE bit will allow updtaes to the prescalers and
  // WDE for 4 clock cycles then it will be reset by
  // hardware.
  WDTCSR = WDTCSR | B00011000;

  // Set the watchdog timeout prescaler value to 1024 K
  // which will yeild a time-out interval of about 8.0 s.
  WDTCSR = B00100001;

  // Enable the watchdog timer interupt.
  WDTCSR = WDTCSR | B01000000;
  MCUSR = MCUSR & B11110111;
}

ISR(WDT_vect)
{
  sleep_count ++; // keep track of how many sleep cycles have been completed.
}

void setup(void)
{
  // start serial
  _Xbee.begin(XBEE_SPEED);
  Serial.begin(XBEE_SPEED);
  watchdogOn(); // Turn on the watch dog timer.
  pinMode(_OutDebugLed, OUTPUT);
  pinMode(_OutXbeeWakeUp, OUTPUT);
  pinMode(_InLightPin, INPUT);
}

void loop(void)
{
  goToSleep(); // ATmega328 goes to sleep for about 8 seconds and continues to execute code when it wakes up

  if (sleep_count == sleep_total)
    {
    sleep_count = 0;
    // CODE TO BE EXECUTED PERIODICALLY
    //digitalWrite(_OutDebugLed, HIGH);
    digitalWrite(_OutXbeeWakeUp, LOW);
    delay(5000);
    unsigned int val = analogRead(_InLightPin);    // read the input pin
    sendZigBeeMsg2(_Xbee,36,val,COORD_ADDR);
    //digitalWrite(_OutDebugLed, LOW);
    digitalWrite(_OutXbeeWakeUp, HIGH);
  }
}
Avec cet toute derniere version le module (Micro + Xbee) se reveille toutes les 10 minutes pour recuperer la luminosite et l’envoyer au systeme domotique. La consomation finale du module complet est de 4.9mA pendant la veille !! On passe donc d’un montage V1 de 96mA (Arduino Uno + Xbee) a un nouveau module consomant 4.9mA (UltraMini+ et Xbee et sleep mode pour tous).
On a donc diviser la consommation du module par 20!!!!
Update du 17 Mai :
J’ai remarque que la batterie se decharge beaucoup plus vite que prevue….et apres quelques investigations le probleme vient du module Xbee qui ne repasse pas en mode sleep lorsque il est en dehors du reseau ZigBee. En googlant un peu j ai trouve un post similaire sur les forum DIGI (constructeur du Xbee) :
“The Xbee product manual states that when an end device loses contact with it’s parent, the end device will poll for the parent, and if no reply is received in three polls the unit will go into a search for network mode.
I find that with Xbee S2 modems (that came in several L/H/T sensors I purchased), when the coordinator inadvertently loses power the end device modem instead starts a rapid fire output of data requests (assumed to be polls) at approximately 5ms intervals for indeterminate amounts of time, a minimum of 30+ seconds. In some instances the polling appears to never stop. In some instances the polling finally stops and a beacon request is sent as a start to a network search.”
Dans mon cas il est possible que le module soit hors réseau pendant un moment (je coupe les modules quand je ne suis pas a la maison)…. Il s’agit d un bug qui est normalement corriger dans les derniers firmware (j ai pourtant mis a jour les modules mais le pb continue).
J’ai donc decider de ne plus utiliser le “sleep mode” des modules et de simplement les alimenter a la demande avec 2 broches de la platine Arduino. J’ai applique la meme methode a tous les autres capteurs de la platine (Temperature, Humidite, et luminosite). Il ne sont alimenter que toutes les X minutes pour effectuer les mesures et les envoyer a la centrale. Voila la derniere version du code :
//Xbee library
#include <XBee.h>
//Deipara library
#include <Deipara.h>
// This library contains functions to set various low-power states for the ATmega328
#include <avr/sleep.h>
//RHT03 library
#include <DHT22.h>

// This variable is made volatile because it is changed inside an interrupt function
// Keep track of how many sleep cycles have been completed.
volatile int sleep_count = 0;
// 75 loop needed since ze sleep for 8s and want to wait 10 minutes
//const int sleep_total = 75;
const int sleep_total = 60;

//pin
const int _InPinDht22 = 6;
const int _OutPowerLightSensor = 7;
const int _OutXbeePower1 = 8;
const int _OutXbeePower2 = 9;
const int _OutPowerDHT22 = 10;
const int _InLightPin = 4;

//Xbee objects
//create Xbee object to control a Xbee
XBee _Xbee = XBee();
//Create reusable response objects for responses we expect to handle
ZBRxResponse _ZbRxResp = ZBRxResponse();
//Setup a DHT22 instance
DHT22 _Dht22(_InPinDht22); //Setup a DHT22 instance
//Global variable used in the program
int _CmdReceived = 0;
int _DataToSend = 0;

void goToSleep()
{
  // The ATmega328 has five different sleep states.
  // See the ATmega 328 datasheet for more information.
  // SLEEP_MODE_IDLE -the least power savings
  // SLEEP_MODE_ADC
  // SLEEP_MODE_PWR_SAVE
  // SLEEP_MODE_STANDBY
  // SLEEP_MODE_PWR_DOWN -the most power savings
  // I am using the deepest sleep mode from which a
  // watchdog timer interrupt can wake the ATMega328
  //digitalWrite(_OutDebugLed, HIGH);

  set_sleep_mode(SLEEP_MODE_PWR_DOWN); // Set sleep mode.
  sleep_enable(); // Enable sleep mode.
  sleep_mode(); // Enter sleep mode.
  // After waking from watchdog interrupt the code continues
  // to execute from this point.

  sleep_disable(); // Disable sleep mode after waking.
  //digitalWrite(_OutDebugLed, LOW);
}

void watchdogOn()
{
  // Clear the reset flag, the WDRF bit (bit 3) of MCUSR.
  MCUSR = MCUSR & B11110111;

  // Set the WDCE bit (bit 4) and the WDE bit (bit 3)
  // of WDTCSR. The WDCE bit must be set in order to
  // change WDE or the watchdog prescalers. Setting the
  // WDCE bit will allow updtaes to the prescalers and
  // WDE for 4 clock cycles then it will be reset by
  // hardware.
  WDTCSR = WDTCSR | B00011000;

  // Set the watchdog timeout prescaler value to 1024 K
  // which will yeild a time-out interval of about 8.0 s.
  WDTCSR = B00100001;

  // Enable the watchdog timer interupt.
  WDTCSR = WDTCSR | B01000000;
  MCUSR = MCUSR & B11110111;
}

ISR(WDT_vect)
{
  sleep_count ++; // keep track of how many sleep cycles have been completed.
}

void setup(void)
{
  pinMode(_OutPowerLightSensor, OUTPUT);
  pinMode(_OutPowerDHT22, OUTPUT);
  pinMode(_OutXbeePower1, OUTPUT);
  pinMode(_OutXbeePower2, OUTPUT);
  pinMode(_InLightPin, INPUT);

  digitalWrite(_OutPowerLightSensor, LOW);
  digitalWrite(_OutPowerDHT22, LOW);
  digitalWrite(_OutXbeePower1, LOW);
  digitalWrite(_OutXbeePower2, LOW);

  // start serial
  _Xbee.begin(XBEE_SPEED);
  Serial.begin(XBEE_SPEED);

  delay(500);

  watchdogOn(); // Turn on the watch dog timer.
}

void loop(void)
{
  goToSleep(); // ATmega328 goes to sleep for about 8 seconds and continues to execute code when it wakes up

  if (sleep_count > sleep_total)
    {
    sleep_count = 0;
    //First we power the Xbee so it has time to reach the network and the other captor
    digitalWrite(_OutXbeePower1, HIGH);
    digitalWrite(_OutXbeePower2, HIGH);
    digitalWrite(_OutPowerDHT22, HIGH);
    digitalWrite(_OutPowerLightSensor, HIGH);
    //Then wait 0.5s to be ready
    delay(1000);
    //we read the light sensor value
    unsigned int aLightValue = analogRead(_InLightPin);
    //we turn it off
    digitalWrite(_OutPowerLightSensor, LOW);
    delay(2000);
    //Then read T
    DHT22_ERROR_t errorCode;
    errorCode = _Dht22.readData();
    int aTempValue=_Dht22.getTemperatureCAsInt();
    int aHumidityValue=_Dht22.getHumidityAsInt();

    digitalWrite(_OutPowerDHT22, LOW);

    //we wait few second to be sure Xbee reach the network
    delay(3000);
    //we send the info
    sendZigBeeMsg2(_Xbee,36,aLightValue,COORD_ADDR);
    delay(50);
    sendZigBeeMsg2(_Xbee,37,aTempValue,COORD_ADDR);
    delay(50);
    sendZigBeeMsg2(_Xbee,38,aHumidityValue,COORD_ADDR);
    //we turn off the xbee module
    digitalWrite(_OutXbeePower1, LOW);
    digitalWrite(_OutXbeePower2, LOW);
  }
}
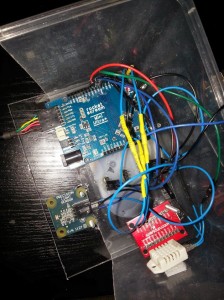
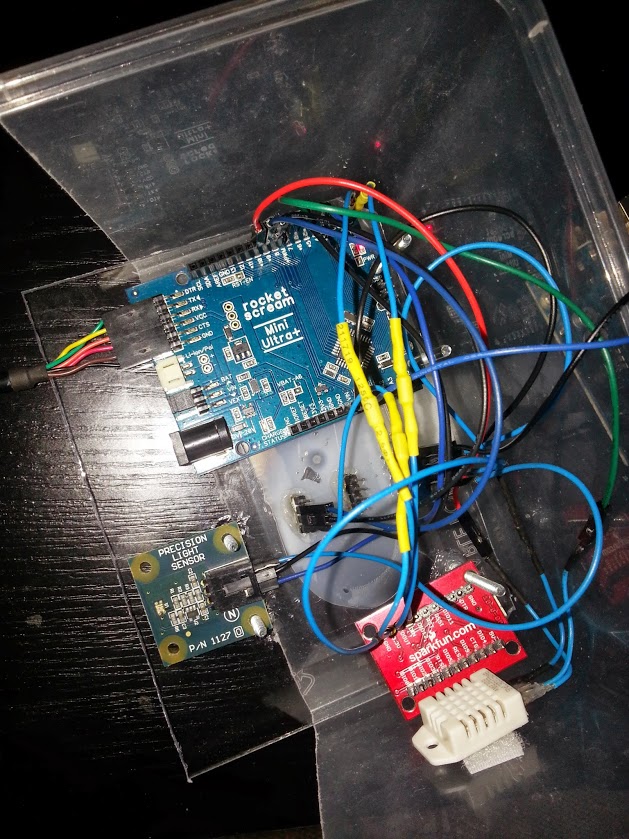
Grâce a ce nouveau code/design le module ne consomme que 1.6mA en veille et aux alentours de 40mA lorsqu’il se réveille pour effectuer les mesures toutes les X minutes (toutes les 9 minutes pour l instant). Voila une photo du montage final :