This article is the part 2 of 2 on my adventure of creating plugins for Google suite et MS office suite. The 2 plugins have the same goal which is retrieve the value of cryptocurrency from various exchanges. The first article was explaining the plugin creation for Google Suite and is available HERE. This article focuses on the plugin creation for the Microsoft office Suite.
Development environment
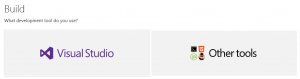
There are 2 main choices for the tooling around Office Online plugin development: Visual Studio or DIY
The 2 set of tooling are detail in the official help page: https://dev.office.com/getting-started/addins
I tried first the Visual Studio solution but I had some issue with the free version (get an error message telling me that I needed a non-free version to create t a plugin) so I decided to go with the option 2 “Other tools”.
The other tool solution is a bundle of Web DEV tools: NodeJs and Yeoman. I already have NodeJs on my windows computer so I tried to use it but sadly face some issue due to my ENV (I’m also working on 2 other projects with nodejs specific setup: Meteor and Electron which tune the ENV for their needs).
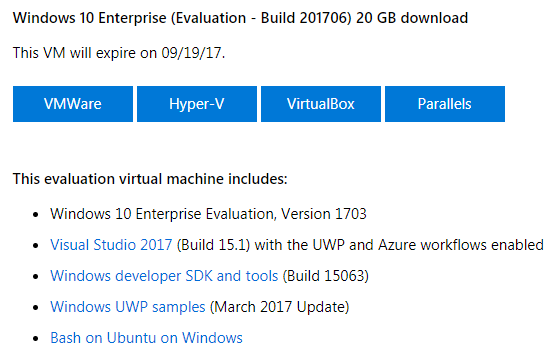
It starts to be frustrating at this point especially after the Google experience with the IDE online… luckily I found a very nice solution here: https://developer.microsoft.com/en-us/windows/downloads/virtual-machines
Microsoft offer free windows VM that you can run on VirtualBox with a set of pre-install DEV tools “Start coding sooner with a virtual machine prepped for Windows 10 development. It has the latest versions of Windows, the developer tools, SDKs, and samples ready to go.”.
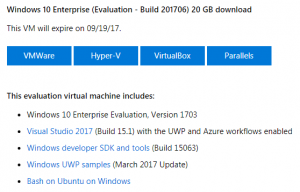
That’s a very nice/smart move from MS and allow a quick DEV env setup without any impact on my windows ENV. The use of the VM is very smooth and this will probably be my default solution for any future DEV I do on windows! I strongly suggest to use it.
Once the VM is started you can easily install all the tools needed on it.
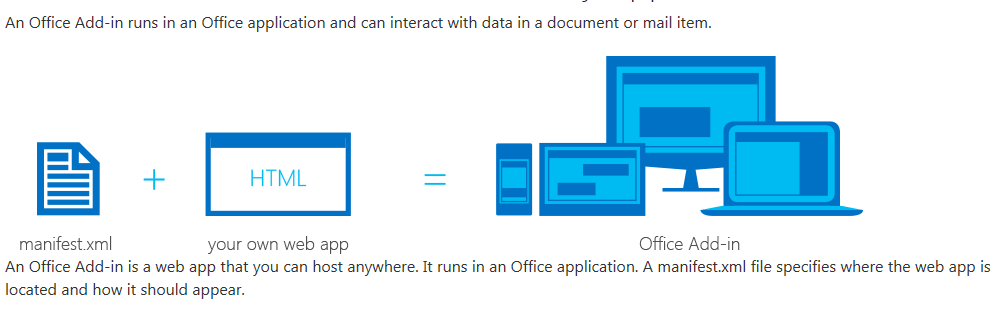
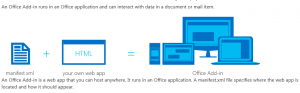
It may be important to explain here a big difference between a plugin for Google and MS. The google plugin was executed on Google side so we did not have to host anything. Microsoft took a different approach since the plugin will run on our side. It means that we will have to setup a WebServer (thus the bigger footprint of the DEV ENV for the MS plugin) to host the plugin.
Pre Code
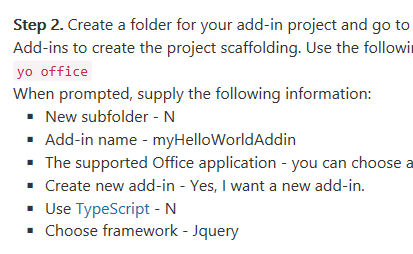
You may have already guess that MS office plugin is written in Javascript like the Google one. The documentation suggests to use Yeoman to kickstart the project. The generator is available here: https://github.com/OfficeDev/generator-office
The documentation on the Office plugin page (link) is outdated:
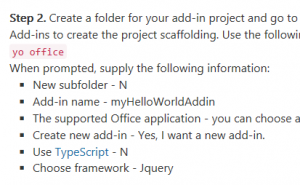
Better follow the readme which is more up to date. I did not keep the full command I use but it should be close to:
yo office name=cryptotracker host=excel framework=angular --js
Then you can start the “empty” project with npm start and access the website. You may notice that the website offers by the plugin do not have a certificate. This prevent you to try it in office online. You need to generate a self-signed certificate and use it. This part was a nightmare!
It is explain in both the official doc and the README of the generator with a dedicated page: https://github.com/OfficeDev/generator-office/blob/master/src/docs/ssl.md
I followed all the instruction but it never worked. I spend hour investigating on my side thinking the issue was due to my import of the certificate in my brother until I find a ticket open in the project “Running add-in locally no longer works, certificate invalid” (see https://github.com/OfficeDev/generator-office/issues/244). I was so mad that the issue was known but not documented anywhere that I update the README to mention it with a PR (https://github.com/OfficeDev/generator-office/pull/249). I wasted so much time on this part…. Just look at the post to know how to generate the certificate and what to do with it.
Once this painful step is done you should be able to see your plugin by opening the URL provided by the generator.
User@WinDev1706Eval MINGW64 /c/Code/cryptocurrenciestracker/MicrosoftPlugin (master)
$ npm start
> crypto-currencies-tracker@0.1.0 start C:\Code\cryptocurrenciestracker\MicrosoftPlugin
> browser-sync start --config bsconfig.json
[Browsersync] Access URLs:
-----------------------------------
       Local: https://localhost:3000
    External: https://10.0.2.15:3000
-----------------------------------
          UI: http://localhost:3001
UI External: http://10.0.2.15:3001
-----------------------------------
For the UI I decided to use ng-office-ui-fabric so it need to be install with:
User@WinDev1706Eval MINGW64 /c/Code/cryptocurrenciestracker/MicrosoftPlugin (master)
$ npm install ng-office-ui-fabric --save
[Browsersync] Reloading Browsers...
[Browsersync] Reloading Browsers...
crypto-currencies-tracker@0.1.0 C:\Code\cryptocurrenciestracker\MicrosoftPlugin
`-- ng-office-ui-fabric@0.15.3
  +-- angular@1.6.4
  `-- office-ui-fabric@2.6.3
To be honest I was excepting it to be install by default since I selected “Angular” in the generator so I start a discussion about it: https://github.com/OfficeDev/generator-office/issues/250
Code
Now that the base code is ready we can start working on our plugin.
Remember the google plugin? Just few lines of code to do some REST call and then annotate some JS function so that they can be used by the user as formula? Bad news for us. It is way more complicated with Office!
Retrieve the data (REST call)
Let’s start with this part since it is the easiest. It is fairly easy since we just need to replace the google specific function by a standard “http.get”:
$http.get(aUrl)
   .then(function (response) {
        var data = response.data;
        console.log("Data received: ", data);
        //var aResponseJson = JSON.parse(aResponseString);
        var aValue = aProviderObj.parseResponse(data, iBinding._selectedPair);
        console.log("aValue: ", aValue);
        aBinding.setDataAsync(aValue, function (asyncResult) { });
    });
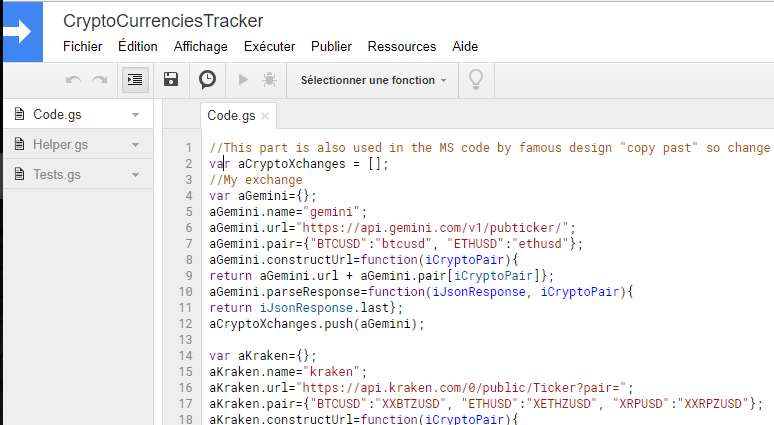
Here we delegate the URL creation and response parsing to each provider objects. Here is one of the provider as example:
var aGdax = {};
  aGdax.name = "gdax";
  aGdax.url = "https://api.gdax.com/products/";
  aGdax.pair = { "BTCUSD": "BTC-USD", "ETHUSD": "ETH-USD" };
  aGdax.constructUrl = function (iCryptoPair) {
    return aGdax.url + aGdax.pair[iCryptoPair] + "/ticker"
  };
  aGdax.parseResponse = function (iJsonResponse, iCryptoPair) {
    return iJsonResponse.price
  };
This allow us to share more code between Office and Google plugins (the providers objects are the same and only the REST call functions are different).
User formula
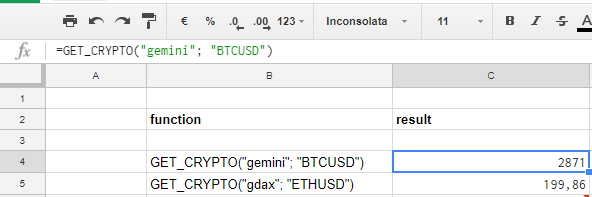
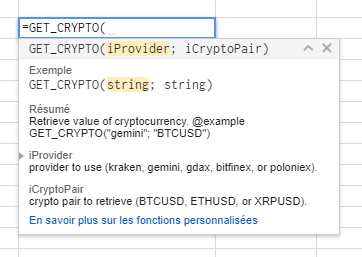
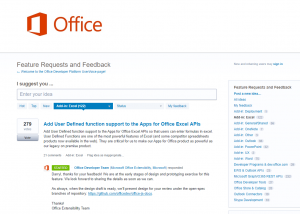
For the Google plugin we added the annotation “* @customfunction” to make a JS function available to the user as a “formula”. I spend some time trying to see how to do the same with Office and it end up that it is not possible today. This functionality is currently the most wanted by developers as you can see on the office online improvement request: https://officespdev.uservoice.com/forums/224641-feature-requests-and-feedback/suggestions/6936956-add-user-defined-function-support-to-the-apps-for
After some research the best alternative (update AUG2018: It now exists: https://techcrunch.com/2018/05/07/microsoft-excel-gets-custom-javascript-functions-and-power-bi-visualizations/) I could found is to use “bindings”. It is an object part of the office plugin library that will bind a cell to a value. More info in the official doc: https://dev.office.com/reference/add-ins/excel/binding and this very good article that demonstrate how to use them (it help me a lot): https://msdn.microsoft.com/en-us/magazine/dn166930.aspx
These bindings will allow us to keep track of certain cells and modify their content on the fly. This match our need but require more work that the Google version.
To use these bindings, we need to associate a binding to some information to be able to update its content with a proper value. The information we need are the “exchange” and the “crypto” to track for this cell. We will thus create new object that hold together these information:
- Reference to a binding (which itself is a reference to a cell)
- Exchange to use
- Crypto currencies to track
To create this object, we will allow the user to pick an exchange and crypto in the plugin menu and then click on a cell and bind all the info together. For example: (UniqId;”gemini”,”BTCUSD”). Then we will add a button to go through all the existing bindings in the sheet and refresh them all.
This is done in the function createBindings:
var uuid = $scope.uuidv4();
    var aNewBinding = { '_uuid': uuid, '_selectedExchange': $scope._selectedExchange, '_selectedPair': $scope._selectedPair };
    console.log('Creating a new binding: ', aNewBinding);
    Office.context.document.bindings.addFromSelectionAsync(
      Office.BindingType.Text, { id: uuid }, function (asyncResult) {
These code sample will create a new binding in the document and keep track if this binding with the uuid in our object. The update of the binding is done in the function “updateBinding”:
Office.context.document.bindings.getByIdAsync(iBinding._uuid,
function (asyncResult) {
if (asyncResult.status !== Office.AsyncResultStatus.Succeeded) {
// TODO: Handle error
console.log("Can not get the bindings - Deal with it");
}
else {
  var aBinding = asyncResult.value;
  console.log("I have the binding: ", aBinding);
  var aProviderObj = getProvider(iBinding._selectedExchange);
  var aUrl = aProviderObj.constructUrl(iBinding._selectedPair);
  console.log("Getting the value for exchange: " + iBinding._selectedExchange + " and pair: " + iBinding._selectedPair);
  if (isKeyValidForProvider(iBinding._selectedPair, iBinding._selectedExchange) == false) {
    throw new Error("Error - unknow iCryptoPair: " + iBinding._selectedPair + " for the provider: " + iBinding._selectedExchange);
  }
  $http.get(aUrl)
    .then(function (response) {
      var data = response.data;
      console.log("Data received: ", data);
      //var aResponseJson = JSON.parse(aResponseString);
      var aValue = aProviderObj.parseResponse(data, iBinding._selectedPair);
      console.log("aValue: ", aValue);
      aBinding.setDataAsync(aValue, function (asyncResult) { });
    });
}
The key here is that we retrieve the binding from the document using its unique ID and then use the info we have about it (exchange/crypto) to update its current value.
I will not detail too much the layout creation (standard JS/HTML with the ngofficeuifabric plugin). You can still have a look at it in the plugin repo.
Now we have a way to bind a cell to an exchange/crypto and update its value when the user presses a button. This is already some pretty good results but one thing is missing: Saving this information!
Save
The bindings are save by office in the document so we do not need to do anything about them. Nevertheless, we created new objects that associate these bindings with our plugin info (crypto/exchange/Ref binding). We need to save these data so that the user can access them again when the document is close/open. One solution would be to save them on the server side since we have to had a server for office plugin. I do not like this solution since it would lead to more work on our side and would preferer if we could “inject” our data in the document and let MS save it for us.
Luckily this functionality is offered by office online plugin: https://dev.office.com/docs/add-ins/develop/persisting-add-in-state-and-settings
The save operation is done in the “” function which is called everytime a new binding is created:
var aCurrentBindings = Office.context.document.settings.get($scope._bindingsKeyInContext);
    if (aCurrentBindings == null) {
      // There are no bindings in the document. Creating a empty container
      aCurrentBindings = [];
    }
    aCurrentBindings.push(aNewBinding);
    console.log('aCurrentBindings', aCurrentBindings);
    //Writting it back in the document context
    Office.context.document.settings.set($scope._bindingsKeyInContext, aCurrentBindings);
    //persist state
    persistSettings();
Note that the “persistSettings()” is just calling “Office.context.document.settings.saveAsync” to ensure the data are persisted when the document is closed.
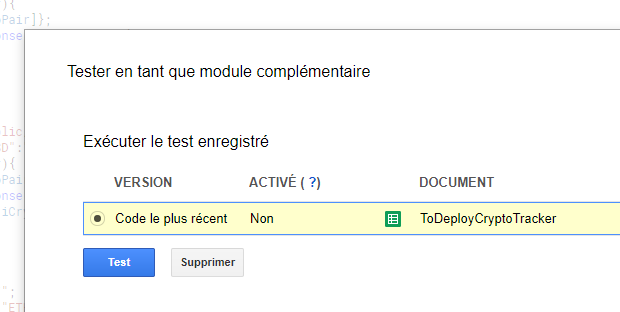
Tests
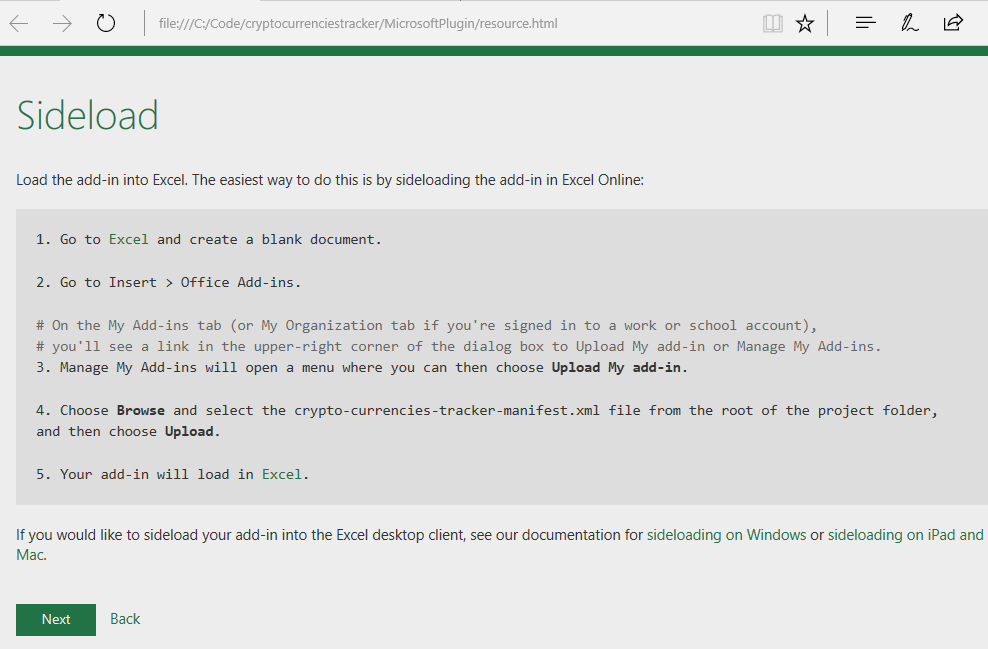
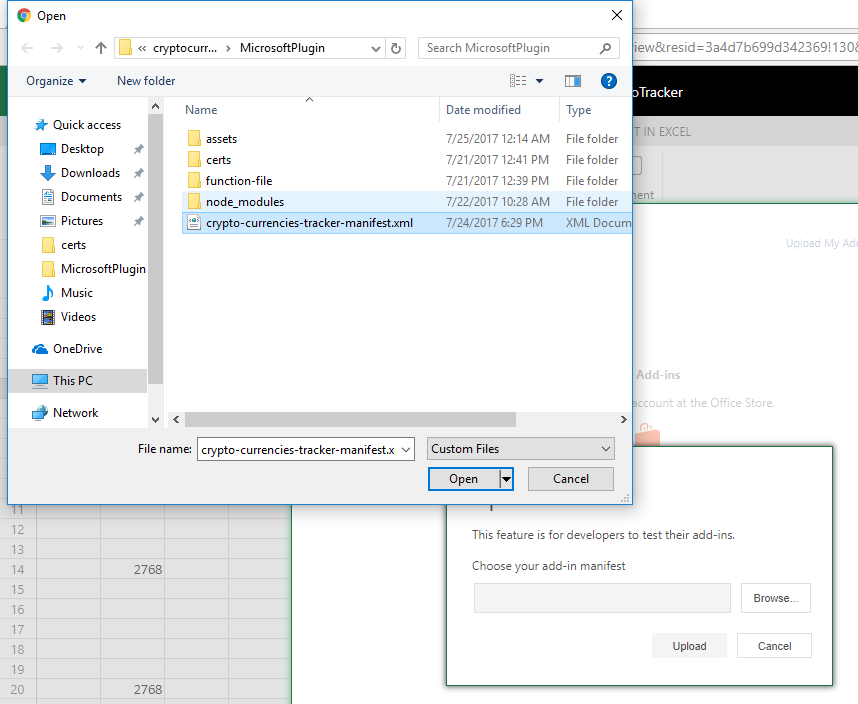
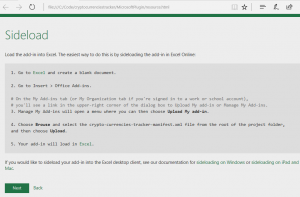
I did not do any automated tests for the office plugin. I just test it live in one spreadsheet. It is fairly easy to test the plugin with office online since it allows to upload a manifest on the fly.
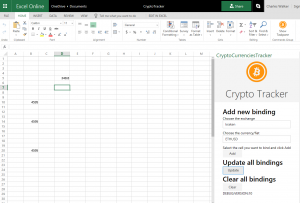
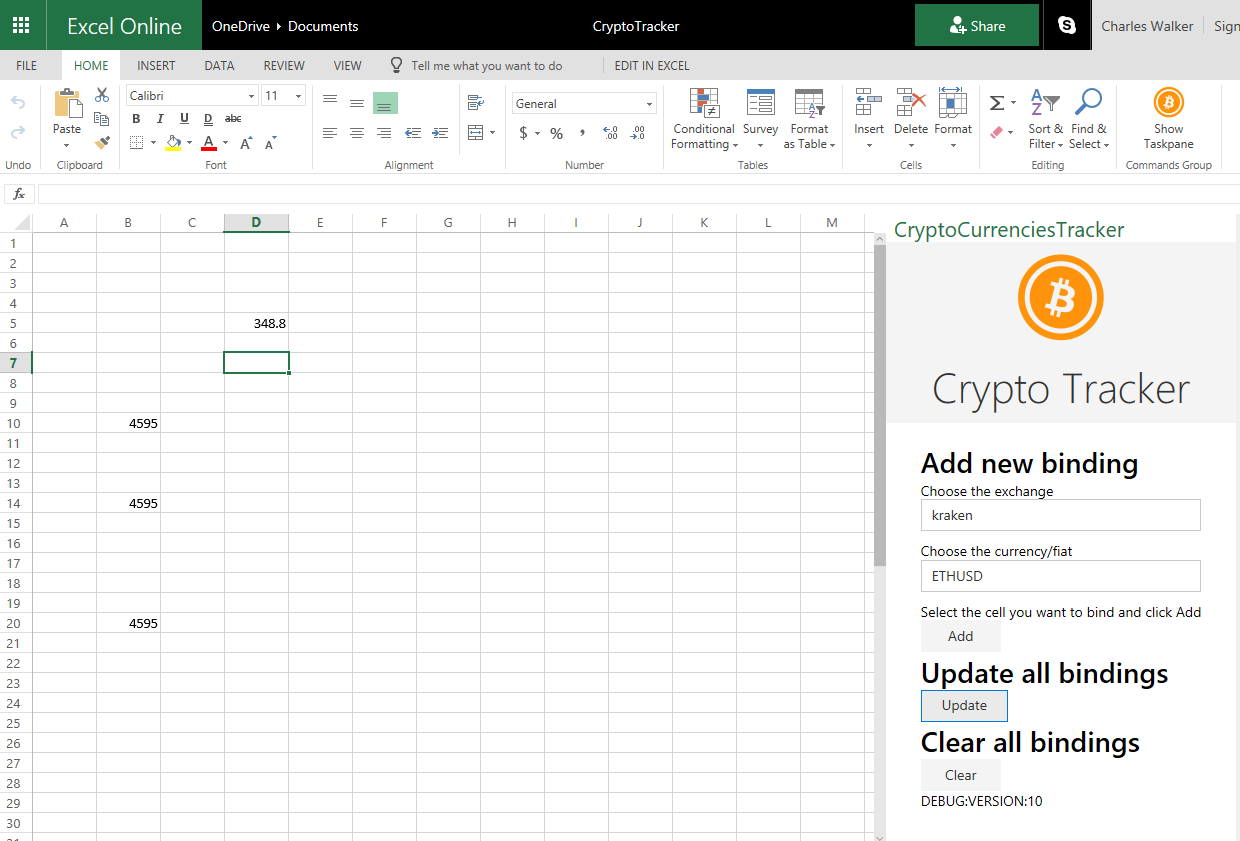
Here are the results after I add a new binding and refresh all the bindings. You can see that the BTC value double between the time I finish the plugin and the time I finish this article….which made me think that I should had some buy instead of spending my time doing Javascript 😉
Publication
I did not publish it require to host my application on a dedicated webserver. I do not want to pay for hosting and will not take time to update it.
Conclusion
It was a really interesting experience to develop this plugin for the 2 biggest platforms. Both of them choose to use JS for the language with different approach. The Google way is simpler with the online IDE/Code hosting but maybe be more limited for complex project. Microsoft experience was more painful due to the time to setup all the environment and also it requires you to host your plugin. This is a big NOGO for me since I do not want to spend too much time on it and I think it explains why there are much more plugin for Google suite. I also think MS should listen to the developer community and work on the “User defined function” since it is currently the most request feature and offer by Google.