AcTricker

Im working in an openspace of 15 peoples and most of us are very cold. There is one thermostat for the whole openspace with the actual temperature display on it but it seems we cannot change the desired temperature… We complain several times to our management about it and after some time the responsible of the amenities comes and explains us the situation. The temperature is set by the landlord for the whole building and the sensor in our openspace is just to detect the temperature in our space to open air vent or not. In other word…there is nothing they can do about it, is it? 

This is the AcTricker! The solution to our problem 😉

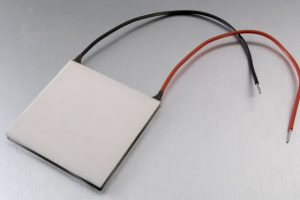
It’s design to be put against the wall around the temperature sensor. It will create a cold micro climate around the sensor to trick it thinking that the office is cold and thus never start the AC in our openspace. It works with a Peltier device that generate cold inside the enclosure and Hot outside of the enclosure when a current is passing (I did not research how/why it is work but just use it as is).

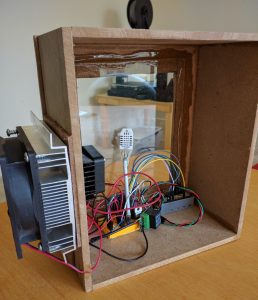
The Peltier device is in sandwich with the hot face facing outside with a big heatsink/fan to dissipate the heat and the cold side facing in the enclosure with a smaller heatsink/fan. It is important to dissipate the heat/cold quickly otherwise the Peltier become inefficient. It would had been enough to stop here and the device would had been functional nevertheless I wanted to add more functionalities… 

The whole system is control with an android application with Bluetooth so people can check what is the simulated temperature inside the enclosure and act on it by stopping the Peltier device and fans. The brain of the whole system on the device side is an Arduino micro (small size). It is connected to a Bluetooth modem and a temperature/humidity sensor (DHT22/RHT03) for data exchange. There is also 2 MOSFET to control the fans and 1 static relay to control the Peltier device. 

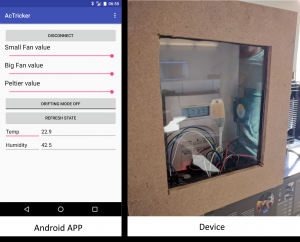
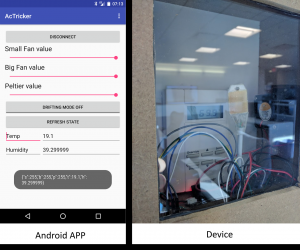
The android application allows to retrieve Temperature and Humidity and control the fans and Peltier. The application design is very similar to the one I created for previous project (like this one) and use the BT of android to communicate with the device so i will not details again here. The Arduino side is also very similar to previous projects (same one than the app). Here is the system after it is plug (android screen capture on the right and device on the left) :

and the result 10 minutes after:

We reduce the temperature from 23 degrees Celsius to 19 degrees Celsius leading the AC to completely stop 😉

Code is on my bitbucket repo.

Improvement idea: Have the Arduino automatically stopping the Peltier/fan when the temperature inside is low enough to save power and reduce noise. 

Static Relay ??

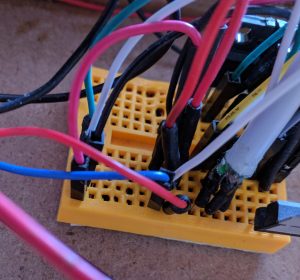
I used a static relay for the Peltier device after burning 2 MOSFETs when trying to control the Peltier with them. The MOSFET were becoming very hot very quick and even damage the breadboard as you can see on the picture

At the beginning, I was not sure why the MOSFET was becoming so hot. I know that the Peltier device use lot of current (around 7A) but the MOSFET I used (P16NF06FP) should had been OK since it was able to handle load up to 11A (I use the TO-220FP package which is plastic package and thus dissipate less heat than the metal package):

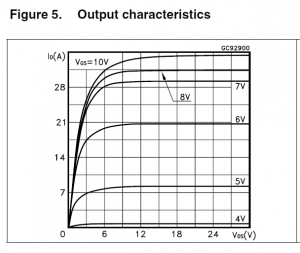
After some research (and particularly this blog post) I think the explanation is that the MOSFET was not able to handle 11A with my configuration. I was driving the MOSFET from the Arduino with a voltage of 5V but the MOSFET require more voltage to be fully open. I was thus not able to use the full MOSFET capability due to a gate voltage too low. The impact of the gate voltage (Vgs) on the possible current output (Id) is also in the datasheet:

As you can see if we switch the Gate voltage from 5V to the recommended 10V the current we can drain grow from 7A to more than 28A.

This is why the MOSFET was become too hot and unusable. I should have bought a MOSFET design to be driven with a gate voltage more compatible with Arduino like the IRL540.

Electric train hack proto

This will be a very quick post since there is nothing new on this project….except maybe the use of openscad to do the design of the train structure.

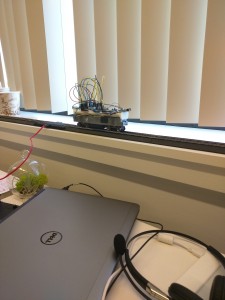
Original goal is to have a small electric train running all over the office hanging on the celling. This is the prototype 😉

Train_proto

I simply buy an electric train on Amazon :

http://www.amazon.com/Bachmann-Trains-Thoroughbred-Ready–Scale/dp/B001RG7LDU/ref=sr_1_12?s=toys-and-games&ie=UTF8&qid=1437179429&sr=1-12

Then I rip it apart to understand how it works to be able to hack it.

Train principle

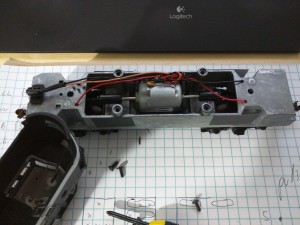
The train itself is very very stupid and is just some metal structure (pretty heavy by the way) with a motor.

Train_rip

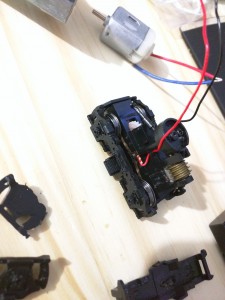
The power for the motor comes directly from the rail through the wheels:

Train_wheel

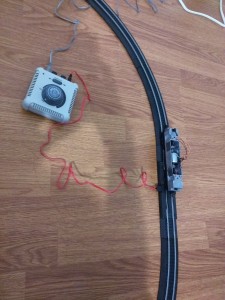
The rails on the other side are smarter since there is a control panel to change the train speed/direction.

Rail_train

The principle is thus very simple…..The command panel generate a different tension in the rail to increase/decrease the speed. It can also invert the tension to go revert.

Hack it

I wanted several things:

  • Possibiility to control the train from phone
  • Train should works without a close circuit (in the office we only have one straigt way).

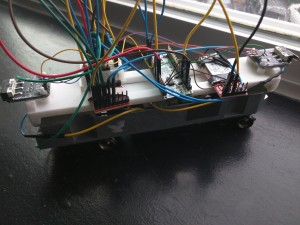
I decided to put the logic in the train rather than the rail. To do so I used an Arduino Micro (same as leonardo but smaller) with a motor controller and a BT receiver. There is nothing new here that I already done/explain in previous project except the motor controller.

The Bluetooth communication with an Android APP is the same software that the one used in this previous project : http://djynet.net/?p=639

The motor controller is the one of Sparkfun (HERE) and can control up to 2 motors. I used it to be able to change the motor rotation direction and speed (with PWM from arduino). This is indeed mandatory because the train will have to go in the 2 directions due to the linear rail circuit (one strait line).

The rails have now a constant tension of 12V from a AC/DC converter which power all the cards. The train is equipped with 2 sensors at front and rear. They are used to detect collision at the end of rail road and change the motor direction to go reverse

collision_sensor

The program is pretty simple since it just monitor collision sensor to change direction and serial bus for incoming Bluetooth message.

Finally I needed to put all that on the top of the train base with a nice 3D printed support. This was the good opportunity to try 3D printing. I done the design with OpenScad

Thus it might be the application you are looking for when you are planning to create 3D models of machine parts but pretty sure is not what you are looking for when you are more interested in creating computer-animated movies.

OpenSCAD is not an interactive modeller. Instead it is something like a 3D-compiler that reads in a script file that describes the object and renders the 3D model from this script file.

To sum up….you code your design and then compile it to generate the STL file 😉

I just created a basic shape with the place for the sensor at both end and then upload it on shapeways (a cloud 3D printing service).

train_3d_base

It fit perfectly the train and here is the final result once everything is mounted on it:

train_final

All the code (Arduino, Android, OpenScad) is available on my bitbucket account here.

Next step…..why not a camera on the train streaming live 😉

Bluetooth Low Energy device and Android communication

Long time I didn’t post an article since I was busy with my move to Boston…..

I was so tired of having to type my Android Password all the time I wanted to use my phone (when listening to music for example) that I decided to do something about it….. Nevertheless I didn’t want to remove the password protection on my phone since it contains lot of important information.

First I decided to have a look on NFC communication to be able to unlock the phone with a NFC card. I didn’t have lot of success with this lead since the NFC module is stop when the device is locked (as far as I understand).

Then I thought about using Bluetooth communication since I already had some experience on BT communication under android (link). I also wanted to have a look on Bluetooth last version “Bluetooth low energy”. It seems a promising technology (Apple Ibeacon, Smartwatch, Activity tracker…). I finally decided to create a service on Android which will detect the BLE devices in range and depending on that can remove/reset the android security policy. Basically if my BLE device is in range the service will remove the android security policy so the phone will no longer require a password. Moreover as soon as the BLE device is no longer in range the service will revert to the previous security policy (see video for concrete example).

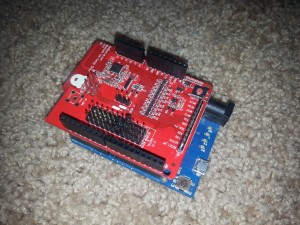
I didn’t focus too much on the hardware part which is simply composed of a BLE beacon. To do it I simply used a Arduino Leonardo and a BLE Arduino shield: http://redbearlab.com/bleshield/

BLE_Ardu

The Arduino code is the example provided in the shield library available here

The Android part of the project is composed of 2 parts: BLE interface and Android Device Policy interface.

BLE interface

The first important thing to understand is that the support of BLE is only working fine with Android > 4.4 (the official doc mentioned 4.3 but some people report issue when trying to use 4.3 and BLE). Be sure to use the API >= 4.4.

There is pretty good tutorial on Google Android Website available here : https://developer.android.com/guide/topics/connectivity/bluetooth-le.html

I mainly follow it (with lot of simplification to kept the only necessary step) to dialogue with my BLE device. It would be useless to describe it here but the process is pretty straightforward :

  • Declare valid permission (some website indicate that the BLUETOOTH_ADMIN is only necessary to turn on/off the BT and thus you don’t need it if the BT is already ON….this is correct for BT but not for BLE. )
  • Activate BT if necessary. Similar to the BT process
  • Scan for BLE devices : Don t forget to stop scanning ASAP otherwise it will empty your phone battery. Implement the scan callback (called every time that the scan finds a device
  • Connect to the BLE : BLE connection is different from the usual BT. There is more granularity in the association process due to the fact that the BLE device can expose several different services with different access level. For example the device could let you access public information without any access check and offer private functionality (like administration) with user access control.
  • Register to BLE change : Once connected we also reegister to the BLE device status changes. This will be used by the process to activate (or not) the Android security policy. This is done by implementing the callback “onConnectionStateChange”
    public void onConnectionStateChange(BluetoothGatt gatt, int status, int newState) {
                Log.i("MyActivity", "onConnectionStateChange");
                gatt.readRemoteRssi();
                if(newState ==  BluetoothProfile.STATE_CONNECTED) {
                    aDeviceInRange = true;
                    deactivate_lock();
                    Log.i("MyActivity", "Device is in range");
                }
                else {
                    aDeviceInRange = false;
                    Log.i("MyActivity", "Device is not in range");
                    activate_lock();
                }
    
                runOnUiThread(new Runnable() {
    
                    @Override
                    public void run() {
                        Log.i("MyActivity", "scanning");
    
                        TextView t = (TextView)findViewById(R.id.textView4);
                        t.setText("Status : " + String.valueOf(aDeviceInRange));
                    }
                });
            }
    

 Android Device Policy changes

Unlike the BLE connection there is no clear documentation about “how to change android security setting”. If you look for it you will find 2 things : KeyguardManager/KeyguardLock and WindowManager.LayoutParams.FLAG_DISMISS_KEYGUARD.

So let’s be clear …. There is no way to do it with the “layout flag”. The best you will achieve is to be able to turn on the phone and display your application but you will not be able to exit your application. If you try to exit your application the OS will ask for the password. That is the best you can do today with this solution.

The other one “KeyguardManager/KeyguardLock” could (or could not) work depending on your luck ! Indeed it has been deprecated since API 13 as explained on the official documentation here : http://developer.android.com/reference/android/app/KeyguardManager.KeyguardLock.html

Hopefully it works fine in my case so I didn’t dig too much for another solution but if it doesn’t works for you I suggest to check the android device administration class available here (but continue reading) : http://developer.android.com/guide/topics/admin/device-admin.html

The lock/unlock code is thus pretty simple with the 2 following functions :

    public void activate_lock() {
        Log.i("MyActivity", "click on activate lock button");
        boolean isAdmin = mDevicePolicyManager.isAdminActive(mComponentName);
        if (isAdmin) {
            boolean result = mDevicePolicyManager.resetPassword("test",DevicePolicyManager.RESET_PASSWORD_REQUIRE_ENTRY);
            KeyguardManager kgManager = (KeyguardManager)getSystemService(Activity.KEYGUARD_SERVICE);
            KeyguardManager.KeyguardLock lock = kgManager.newKeyguardLock(Context.KEYGUARD_SERVICE);
            lock.reenableKeyguard();
        }else{
            Toast.makeText(getApplicationContext(), "Not Registered as admin", Toast.LENGTH_SHORT).show();
        }
    }

    public void deactivate_lock() {
        Log.i("MyActivity", "click on remove lock button");
        boolean isAdmin = mDevicePolicyManager.isAdminActive(mComponentName);
        if (isAdmin) {
            mDevicePolicyManager.resetPassword("",0);
            KeyguardManager kgManager = (KeyguardManager)getSystemService(Activity.KEYGUARD_SERVICE);
            KeyguardManager.KeyguardLock lock = kgManager.newKeyguardLock(Context.KEYGUARD_SERVICE);
            lock.disableKeyguard();
        }else{
            Toast.makeText(getApplicationContext(), "Not Registered as admin", Toast.LENGTH_SHORT).show();
        }
    }

The full code (not sure it include the last changes done just before I move to Boston) available on my BitBucket account here and a demo video is available on youtube here.

Next steps

None ! indeed I just read an article about android 5.0 and this exact functionality has been integrated on the OS itself so my app is no longer useful. The full article is available on TC : http://techcrunch.com/2014/10/28/android-5-lollipop-security-features/ but it solve the exact same problem as you can see from the abstract below :

Lollipop adds some new lock methods that make it easier to keep your 
device secure, which is a huge boon to the overall integrity of the 
platform. The biggest roadblock to mobile device security is actually 
user apathy, which sees people skipping basic security practices like 
implementing a lock screen pin code because it’s inconvenient when 
you’re checking your device every few minutes. Lollipop offers Smart 
Lock to help address this, which uses paired devices to let you tell 
your device it’s okay to open up without requiring a password or 
other means of authentication.

Android Studio 0.8.14 – missing SKD

I just had a new PC so I needed to reinstall Android Studio to do some Android DEV. I already install it several time previously but face an issue in the last version (0.8.14) available on the official website : https://developer.android.com/sdk/installing/studio.html

The download link mentioned that the SDK is part of the download package:

Androidpackage

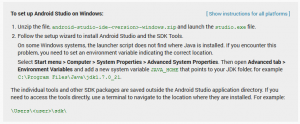
The install page also details the procedure :

installAndroidStudio

Both of these 2 sources lead to think that the SDK is part of the installer…which in no longer the case since 0.8.14. So if you try to follow this procedure Android studio will not start properly (it will ask you for the SDK). I thought there was something wrong with my install and lost too much time investigating what could be wrong. I tried to run it as admin or other trick found on SO…..this is completely useless !

If you have the same error it is in fact completely normal ! Since 0.8.14 the SDK is no longer part of the DL and you have to install it yourself. The documentation is not up to date which is very confusing but the information is available on some place but hard to find. You will have it on the “recent change” page on the beta side channel available here : http://tools.android.com/recent/androidstudio0814inbetachannel

AndroidNoSdk

So in case you have the same issue…..don’t spend time on useless investigation and just install the SDK yourself ! I hope it will help people until google update the info on the official install doc.


BT discovery on Android

This article present how to use Bluetooth on Android device. The full project include Arduino Leonardo card and is detailed on this article : http://djynet.net/?p=639

First….some ressources to understand BT communication and BT handling on Android :

  • https://learn.sparkfun.com/tutorials/using-the-bluesmirf/all
  • https://learn.sparkfun.com/tutorials/bluetooth-basics/all
  • http://developer.android.com/guide/topics/connectivity/bluetooth.html

Before starting….I thanks the guy who wrote the following article which help me a lot to understand android – Arduino BT links :
http://english.cxem.net/arduino/arduino5.php

I finish the DEV but it happen to be more complicated than I originaly think it would be… Especialy the “receive” part from Android which require ansynch tasks. Nevertheless I put lot of comments in the code so it should be easy to understand it.

The first things is to request BT use in the manifest :

<uses-permission android:name=”android.permission.BLUETOOTH” />

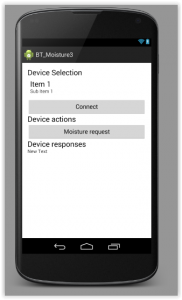
Then I created a simple layout with some button and textview to interact with the user
BT_Moisture_interface

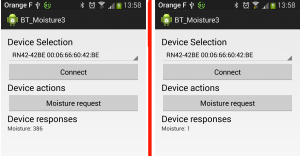
The first section hold the potential BT devices and allow to connect to the one selected. The second section is only 1 button “Moisture request” which will send the char ‘h’ to the arduino board. Last text view is used to display the Arduino response which is the moisture value in the earth.

The association button-callback is done in the xml view directly :

<Button
        android:layout_width="fill_parent"
        android:layout_height="wrap_content"
        android:id="@+id/connect"
        android:onClick="myClickHandler"
        android:text="@string/hello_world" />

At startup the program check if the phone as BT capability :

if (mBluetoothAdapter == null) {
            // Device does not support Bluetooth
            Log.w("MyActivity", "Device does not support Bluetooth");
            Toast.makeText(this.getParent(), "Go buy a more recent phone", Toast.LENGTH_LONG).show();
        }
and if the BT is not turn on it will request it to the OS (which will prompt the user) :
if (!mBluetoothAdapter.isEnabled()) {
                Log.i("MyActivity", "BT is not enabled. I request to start it");
                Intent enableBtIntent = new Intent(BluetoothAdapter.ACTION_REQUEST_ENABLE);
                startActivityForResult(enableBtIntent, 643);
            }

Another solution is to turn it on without asking kindly but it request more permission (in manifest).

Once the BT is ready the program will populate the UI with the list of paired devices :

BluetoothAdapter mBluetoothAdapter = BluetoothAdapter.getDefaultAdapter();
        Set<BluetoothDevice> pairedDevices = mBluetoothAdapter.getBondedDevices();
        // If there are paired devices
        if (pairedDevices.size() > 0) {

            //Fill the spinner on view with devices
            Spinner spinner = (Spinner) findViewById(R.id.spinner);
            // Create an empty ArrayAdapter
            ArrayAdapter <CharSequence> adapter = new ArrayAdapter <CharSequence> (this, android.R.layout.simple_spinner_item );
            // Specify the layout to use when the list of choices appears
            adapter.setDropDownViewResource(android.R.layout.simple_spinner_dropdown_item);
            // Apply the adapter to the spinner
            spinner.setAdapter(adapter);
            //Populate IT !!
            for (BluetoothDevice device : pairedDevices) {
                adapter.add(device.getName() + "\n" + device.getAddress());
            }
        }

I didn’t handle the BT discovery here….which means that I already paired my Arduino with my phone. This operation could be done directly in android when you turn on the BT. It need to be done only 1 time and will ask you the code of the arduino BT module (1234).

Then….the user can select its module in the drop down menu (that we just populate in the previous function) and open a connection with it by pressing the “connect” button. It will call button callback :

public void myClickHandler(View v) {
        Log.i("MyActivity", "click button");
        connectMoisture();
    }

which call the real interesting process 🙂

protected void connectMoisture()
    {
        BluetoothAdapter mBluetoothAdapter = BluetoothAdapter.getDefaultAdapter();

        Log.i("MyActivity", "We open the connection");
        // I will use the standard SPP UUID - remember it is not link to our device on contrary of MAC address
        UUID aSppUuid = UUID.fromString("00001101-0000-1000-8000-00805F9B34FB");
        // The Arduino BT receiver address
        String aArduinoBtAddress = "00:06:66:60:42:BE";
        try{
            Log.i("MyActivity", "Going to retrieve the device");
            BluetoothDevice aBtDevice = mBluetoothAdapter.getRemoteDevice(aArduinoBtAddress);
            Log.i("MyActivity", "Device retrieved, creating socket now");
            _blueToothSocket = aBtDevice.createRfcommSocketToServiceRecord(aSppUuid);
            Log.i("MyActivity", "Socket created");
        }catch(IOException createSocketException){
            Log.e("MyActivity", "error1508"+ createSocketException.getMessage());
        }
        // Establish the connection.  This will block until it connects.
        Log.i("MyActivity", "Will try to connect to remote device");
        try {
            _blueToothSocket.connect();
            Log.i("MyActivity", "Connection is done");
        } catch (IOException e) {
            Log.e("MyActivity", "error148"+ e.getMessage());
            try {
                Log.i("MyActivity", "Closing socket");
                _blueToothSocket.close();
                Log.i("MyActivity", "Socket closed");
            } catch (IOException e2) {
                Log.e("MyActivity", "another issue" + e2.getMessage());
            }
        }
        // Step 3 create stream to talk with BT deice
        try {
            _streamOutgoing = _blueToothSocket.getOutputStream();
        } catch (IOException e) {
            Log.e("MyActivity", "another issue" + e.getMessage());
        }
    }
Now the program is connected to the device (the Ardunio BT board will probably have a LED which will reflect this new state). The user can now request the moisture value by clicking on the second button :
public void mySecondClickHandler(View v) {
        Log.i("MyActivity", "Sending h");
        //sendData("l");
        sendData("h");

    }

which call a sending routing with ‘h’ char :

protected void sendData(String message) {
        // start thread which handle input BT data before we send the request to Arduino.
        // With this design we know that we will be able to handle response
        ImplementsRunnable rc = new ImplementsRunnable();
        Thread t1 = new Thread(rc);
        t1.start();
        // The thread which is listening to input data from Arduino is now started
        // We can go to next step and send request to Arduino

        //Convert the String to send to byte
        byte[] msgBuffer = message.getBytes();
        Log.d("MyActivity", "About to send : " + message);

        try {
            _streamOutgoing.write(msgBuffer);
            //The next line is sending h char. I kept it as a debug test because I was worried Android will add extra char which will not be understand on Arduino side like end of line
            //_streamOutgoing.write('h');
        } catch (IOException e) {
            Log.e("MyActivity", "Error when trying to send data : " + e.getMessage());
        }
        //This is over. The Arduino response will be handle separately by another thread that we started before sending the request
    }

OK….So here I have to explain the first part where we start a dedicated thread. Before sending the request to Arduino Board we start a thread which will wait for incoming data on BT. It is the normal way to handle incoming message. The other part of the function is the data sending to arduino.

After this call the arduino received the char ‘h’ which trig a moisture detection and it will send back the moisture value to the BT module which will send it to the Android Phone.

As explained the reception is done in a dedicated thread. This is done by the following class which implement the “runable” interface :

class ImplementsRunnable implements Runnable {
        private InputStream _streamIncoming = null;

        public void run() {
            Log.d("MyActivity", "Thread run");

            //First we retrieve the input stream of the BT socket to be able to read incoming bytes
            try {
                _streamIncoming = _blueToothSocket.getInputStream();
                Log.i("MyActivity", "Input stream acquired");
            } catch (IOException e) {
                Log.e("MyActivity", "another issue" + e.getMessage());
            }

            //This single read works because I only wait for one message from Arduino but we should have a infinite loop here to catch everything arriving all the time
            try {
                //Not clean but we only receive a small message
                BufferedReader aMyBufferReader = new BufferedReader(new InputStreamReader(_streamIncoming));
                String aArduinoDataStr = "";
                aArduinoDataStr = aMyBufferReader.readLine();

                Log.i("MyActivity", "Received " + aArduinoDataStr );
                _ThreadMsgHandler.obtainMessage(31444, aArduinoDataStr).sendToTarget();     // Send to message queue Handler

            } catch (IOException e) {
                Log.e("MyActivity", "another issue" + e.getMessage());
            }
            Log.i("MyActivity", "Leaving thread run method " );
        }
    }

Once data are received by this thread they will be forwarded to the UI thread. This is done by the use of ‘Android handler’ in the UI thread :

_ThreadMsgHandler = new Handler(Looper.getMainLooper()) {
            //Will be called when new message arrive from other threads
            public void handleMessage(Message msg) {
                Log.d("MyActivity", "Handler is handling a message of type : " + msg.what);
                switch (msg.what) {
                    //Random ID .... should be the same as the one use when sending the msg from the thread
                    case 31444:
                        String aMyMoistureValue = (String) msg.obj;
                        // For now we only log it and toast it
                        Log.i("MyActivity", "Toasting moisture value : " + aMyMoistureValue);
                        Toast.makeText(MyActivity.this, aMyMoistureValue, Toast.LENGTH_LONG).show();
                        TextView aMyTextViewHandlingResponse = (TextView) findViewById(R.id.textView);
                        aMyTextViewHandlingResponse.setText("Moisture: " + aMyMoistureValue);
                        break;
                    //I think it should never occurs but just to be safe we log it
                    default:
                        Log.w("MyActivity", "Received an unknown message type : " + msg.what);
                }
            };
        };

Don’t forget…..this methods in on the UI thread ! We will come back to it after I finish explaining my runable class…..

The Data are send from the runable class to the UI thread with the handler :

_ThreadMsgHandler.obtainMessage(31444, aArduinoDataStr).sendToTarget();     // Send to message queue Handler

which is “catch” in the UI thread by the handler I just show before. The important point is the 31444 which has to be the same and act as an unique identifier. To finish the UI thread toast this value (debuging) and update the textview.

The results with the sensor in moist earth (or not) with the Arduino and Android output.
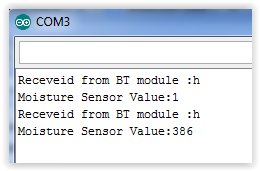
Moisture_Ardu

Andro_Moisture

The whole code for the project (Android and Arduino) is on my bitbucket account here.


Android 0.8 Beta – INSTALL_FAILED_OLDER_SDK

I updated my android studio to the last version 0.8.2. Since this update it is no longer possible to have my APP runing on my phone.

Everytime I tried to upload it to the phone I have the following error :
INSTALL_FAILED_OLDER_SDK

I tried a fresh install too leading to the same issue. After some googling it seems the issue impact lot of people :

  • http://stackoverflow.com/questions/24465289/android-studio-failure-install-failed-older-sdk
  • http://stackoverflow.com/questions/24469754/failure-install-failed-older-sdk-in-android-studio
  • https://code.google.com/p/android/issues/detail?id=72840
  • http://blog.csdn.net/hotlinhao/article/details/37498201
  • ….

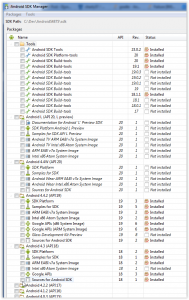
I m not interested in the last API of Android L since my phone is only 4.3 nevertheless even by specifiying that I want to be using 4.3 the build didn’t take it into account. The solution I found is to remove all Android L SDK/Compiler from  the SDK manager and install android 4.3 (and/or 4.4)

Android4-3bug

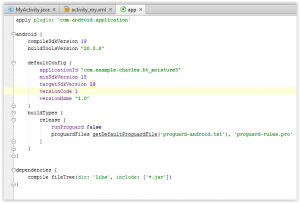
and then restart android. After that the SDK selection will works fine and if you create a new project you should have the following gradle file.

gradleXml

Now the upload to the phone works fine 😉

Android Widget V2 : Ajout Wifi

Suite de mon precedant artcile sur la creation d’un widget android :
http://djynet.net/?p=585

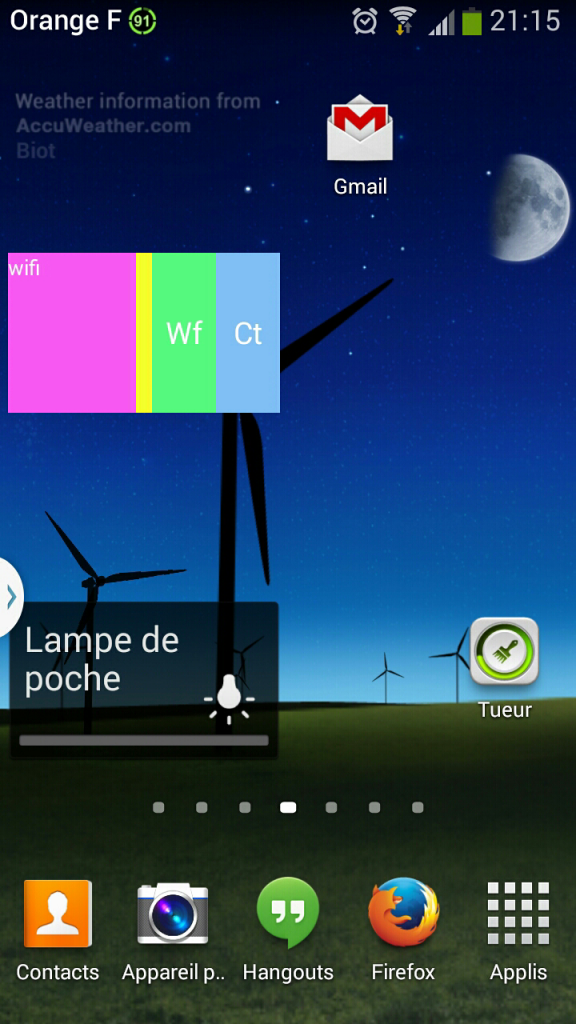
J’ai décidé d’ajouter un bouton supplémentaire pour changer l’état du wifi sur le téléphone. La premiere etape est d’ajouter la possibilite de controler le widi depuis notre application en ajoutant les permissions dans le manifest :

<uses-permission android:name="android.permission.ACCESS_WIFI_STATE" />
<uses-permission android:name="android.permission.CHANGE_WIFI_STATE" />
<uses-permission android:name="android.permission.WAKE_LOCK" />

Puis ajouter un bouton dans le layout du widget :

<Button
        android:id="@ id/sync_button2"
        android:layout_width="40dp"
        android:layout_height="match_parent"
        android:background="@color/green"
        android:text="@string/button1"
        android:layout_toLeftOf="@ id/sync_button"/>

Il est ensuite possible d’utiliser la classe android “wifimanager” pour intergair avec le module wifi.

import android.net.wifi.WifiManager;
...
 WifiManager wifiManager = (WifiManager) context.getSystemService(Context.WIFI_SERVICE);
        if (wifiManager.isWifiEnabled()) {
            wifiManager.setWifiEnabled(false);
        } else {
            wifiManager.setWifiEnabled(true);
        }

Dans notre cas on utilisera un event/broadcast pour déclenché cette action. Il s’agit du même type de code utilise dans mon article précédant.

Screenshots_2014-02-12-21-15-57

L’ensemble du code est disponible sur Bitbucket :

https://charly37@bitbucket.org/charly37/wifi3gstarterv2


Creation widget android

Dans cet article je vais expliquer comment creer un widget pour android. Le but etant d’avoir un widget sur le bureau avec un bouton et un compteur de clique.

Widget layout

La première étape est la création du layout pour notre widget. Ce dernier sera compose d’un « textview » pour afficher notre compteur et d’un bouton pour augmenter le compteur. On Placera le tout dans un « relative layout » avec la zone de text a gauche et le bouton a droite.

Voila le xml correspondant :

<?xml version="1.0" encoding="utf-8"?>

<RelativeLayout xmlns:android="http://schemas.android.com/apk/res/android"
    android:layout_width="match_parent"
    android:layout_height="match_parent"
    android:background="@color/yellow">

    <Button
        android:id="@ id/sync_button"
        android:layout_width="40dp"
        android:layout_height="match_parent"
        android:background="@color/blue"
        android:layout_alignParentRight="true"
        android:text="" />

    <TextView
        android:id="@ id/desc"
        android:layout_width="80dp"
        android:layout_height="match_parent"
        android:maxLines="1"
        android:text=""
        android:background="@color/pink"
        android:textColor="#fcfcfc"
        android:textSize="13sp"
        android:textStyle="normal" />

</RelativeLayout>

Ce fichier xml est a place dans /res/layout/widget_layout.xml

PS : Ce widget utilise des couleurs définies dans le fichier colors.xml. Cette méthode est décrite dans un de mes précédents posts.

Widget info

La seconde étape est de créer un fichier xml qui décrit notre widget. Ce fichier xml contient les informations générale de notre widget comme sa taille et la fréquence a laquelle on souhaite que l ‘OS l’update. Pour éviter une trop grand utilisation de la batterie Android ne prendra pas en compte les valeurs inférieur a 30 minutes.

Voila le fichier xml :

<?xml version="1.0" encoding="utf-8"?>

<appwidget-provider xmlns:android="http://schemas.android.com/apk/res/android"
    android:initialLayout="@layout/widget_layout"
    android:minHeight="40dp"
    android:minWidth="120dp"
    android:previewImage="@drawable/ic_launcher2"
    android:resizeMode="horizontal|vertical"
    android:updatePeriodMillis="1800000" >
</appwidget-provider>

TODO

AppWidgetProvider

Il s’agit d’une classe qui va se charger de la mise a jour du layout lors de la réception de l’événement “android.appwidget.action.APPWIDGET_UPDATE”. Pour cela la classe hérite de la classe de base android “AppWidgetProvider”.

public class MyAppWidgetProvider extends AppWidgetProvider

Cette classe facilite la création de widget en étendant la classe android générique de réception d’événement “BroadcastReceiver”.

Notre classe “MyAppWidgetProvider” doit donc implémenter la méthode “onUpdate” qui est appele a chaque update de notre widget. Dans cette méthode on va updater la view “remote” du widget. En effet le widget est embarque dans le homescreen et utilise donc une “remote view”.

On définie aussi le comportement du widget lors de l’appuie sur le bouton. Plus exactement on va générer un événement “net.djynet.intent.action.UPDATE_WIDGET” :

Intent intent = new Intent();
intent.setAction("net.djynet.intent.action.UPDATE_WIDGET");
return PendingIntent.getBroadcast(context, 0, intent,PendingIntent.FLAG_UPDATE_CURRENT);

Cet événement sera capture par une autre classe décrite ci-dessous.

BroadcastReceiver

Cette seconde classe sera en charge de gérer l’événement “net.djynet.intent.action.UPDATE_WIDGET” crée lors d’un clique sur le bouton. Pour cela notre classe va également hérité de”BroadcastReceiver” (et non AppWidgetProvider car il ne s’agit pas directement d’un événement standard android pour les widgets)

public class MyBroadcastReceiver extends BroadcastReceiver

La méthode “onreceive” doit être surcharge pour gérer l’événement de clique avec :

public void onReceive(Context context, Intent intent) {
        Log.i(context.getString(R.string.app_name_log), "Entering MyBroadcastReceiver:onReceive");
        if (intent.getAction().equals("net.djynet.intent.action.UPDATE_WIDGET")) {
            updateWidgetPictureAndButtonListener(context);
        }
    }

Tout comme notre “AppWidgetProvider” cette méthode va mettre a jour la vue de notre widget en indiquant le nombre de clique effectue sur le bouton.

private void updateWidgetPictureAndButtonListener(Context context) {
        Log.i(context.getString(R.string.app_name_log), "Entering MyBroadcastReceiver:updateWidgetPictureAndButtonListener");
        RemoteViews remoteViews = new RemoteViews(context.getPackageName(),R.layout.widget_layout);

        // updating view
        remoteViews.setTextViewText(R.id.desc, getDesc(context));

        // re-registering for click listener
        remoteViews.setOnClickPendingIntent(R.id.sync_button, MyAppWidgetProvider.buildButtonPendingIntent(context));

        MyAppWidgetProvider.pushWidgetUpdate(context.getApplicationContext(),remoteViews);
    }

Manifest

Pour rappel le manifest d’une application android permet au système de savoir ce que fait notre application et ses interactions avec le système android.

Dans notre manifest on va créer 2 « receiver » pour notre widget. On utilise le tag « receiver » pour les widget car ils font partis des « boradcast receiver ». Cela signifie qu’ils fonctionne sur la réception d’événements. Pour chaque receiver on indique donc l’événement et la classe qui sera en charge de sa gestion.

  • android.appwidget.action.APPWIDGET_UPDATE : Il s’agit de l’événement trige par le systeme lorsque ce dernier pense qu il est nécessaire d’updater le widget. La classe en charge de la gestion de cet événement est “net.djynet.wifistarter3g_main.MyAppWidgetProvider”
  • net.djynet.intent.action.UPDATE_WIDGET : Il s’agit de l’événement qu on va triger lors d’un appuie sur le bouton du widget. La classe en charge de la gestion de cet événement est “net.djynet.wifistarter3g_main.MyBroadcastReceiver”.

On va également indiquer le fichier de configuration associe a notre widget dans le tag « meta-data ».

Voila notre manifest :

<?xml version="1.0" encoding="utf-8"?>
<manifest xmlns:android="http://schemas.android.com/apk/res/android"
    package="net.djynet.wifistarter3g_main" >

    <application
        android:allowBackup="true"
        android:icon="@drawable/ic_launcher"
        android:label="@string/app_name"
        android:theme="@style/AppTheme" >

        <receiver android:name="net.djynet.wifistarter3g_main.MyAppWidgetProvider"
            android:label="@string/app_name">
            <intent-filter>
                <action android:name="android.appwidget.action.APPWIDGET_UPDATE" />
            </intent-filter>

            <meta-data
                android:name="android.appwidget.provider"
                android:resource="@xml/demo_widget_provider" />
        </receiver>

        <receiver android:name="net.djynet.wifistarter3g_main.MyBroadcastReceiver"
            android:label="@string/app_name" >
            <intent-filter>
                <action android:name="net.djynet.intent.action.UPDATE_WIDGET" />
            </intent-filter>

            <meta-data
                android:name="android.appwidget.provider"
                android:resource="@xml/demo_widget_provider" />
        </receiver>

    </application>

</manifest>

 Resultat

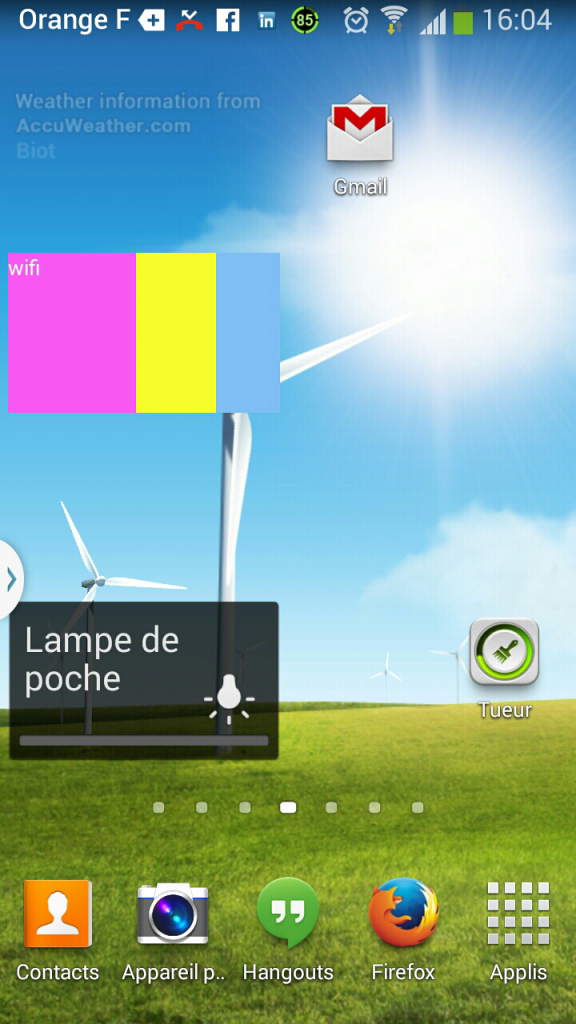
Voila le résultat une fois le widget installe sur le bureau :

WidgetResult1

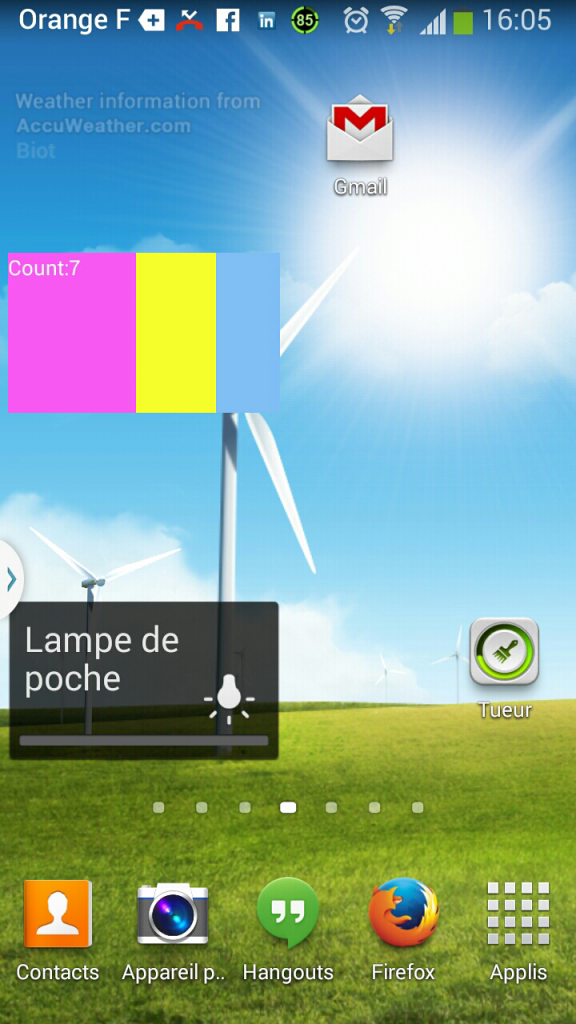
Les appuies sur le bouton (en bleue a droite du widget) vont augmenter le compteur affiche comme on peut le voir ci dessous.

Widget2

Le résultat n’est pas très jolie mais permet de bien visualise les différents éléments du layout.

L’ensemble du code est disponible sur bitbucket ICI.

Couleur fond dans layout android

Pour mettre une couleur de fond a un layout Android on peut directement utiliser le code couleur dans le xml du layout :

android:background="#DC143C"

mais il est préférable de définir nos couleurs dans un fichier de ressource xml a part auquel on fera référence dans le xml du layout.

Pour ça il faut donc créer un fichier xml dans les ressource du projet. Par exemple créer le fichier xml colors.xml dans le répertoire /res/values

On peut ensuite définir nos couleurs dans ce fichier :

<?xml version="1.0" encoding="utf-8"?>
<resources>
    <color name="red">#FF0000</color>
    <color name="green">#58FA82</color>
    <color name="blue">#81BEF7</color>
    <color name="yellow">#F7FE2E</color>
    <color name="pink">#FA58F4</color>
</resources>

L’utilisation des couleurs est maintenant possible dans le layout de notre application/widget avec :

<?xml version="1.0" encoding="utf-8"?>

<RelativeLayout xmlns:android="http://schemas.android.com/apk/res/android"
    android:layout_width="match_parent"
    android:layout_height="match_parent"
    android:background="@color/yellow">

    <RelativeLayout
        android:id="@+id/buttonContainer"
        android:layout_width="50dp"
        android:layout_height="50dp"
        android:background="@color/red"
        android:layout_alignParentBottom="true" >

        <Button
            android:id="@+id/sync_button"
            android:layout_width="40dp"
            android:layout_height="40dp"
            android:background="@color/blue"
            android:layout_centerInParent="true"
            android:text="" />
    </RelativeLayout>
...

Reconnaissance vocale

Création d’une application android pour le système de domotique qui sera capable de reconnaitre la parole pour actionner certaines actions. Le but est de remplacer “Tasker + auto voice” par une application fait maison et plus plus adapte au système.

on utilise l API google et c est google qui fait tout le boulot de décodage de la parole (et plutôt bien) :

public void speak(View view) {
 Intent intent = new Intent(RecognizerIntent.ACTION_RECOGNIZE_SPEECH);
// Specify the calling package to identify your application
 intent.putExtra(RecognizerIntent.EXTRA_CALLING_PACKAGE, getClass().getPackage().getName());
// Given an hint to the recognizer about what the user is going to say
 //There are two form of language model available
 //1.LANGUAGE_MODEL_WEB_SEARCH : For short phrases
 //2.LANGUAGE_MODEL_FREE_FORM  : If not sure about the words or phrases and its domain.
 intent.putExtra(RecognizerIntent.EXTRA_LANGUAGE_MODEL,RecognizerIntent.LANGUAGE_MODEL_WEB_SEARCH);
// Specify how many results you want to receive. The results will be sorted where the first result is the one with higher confidence.
 int noOfMatches = 4;
 intent.putExtra(RecognizerIntent.EXTRA_MAX_RESULTS, noOfMatches);
 //Start the Voice recognizer activity for the result.
 startActivityForResult(intent, VOICE_RECOGNITION_REQUEST_CODE);
 }

et on attend la réponse de l’activité :

protected void onActivityResult(int requestCode, int resultCode, Intent data) {
 if (requestCode == VOICE_RECOGNITION_REQUEST_CODE)
//If Voice recognition is successful then it returns RESULT_OK
 if(resultCode == RESULT_OK) {
ArrayList<java.lang.String> textMatchList = data
 .getStringArrayListExtra(RecognizerIntent.EXTRA_RESULTS);
if (!textMatchList.isEmpty()) {
 mlvTextMatches
 .setAdapter(new ArrayAdapter<java.lang.String>(this,
 android.R.layout.simple_list_item_1,
 textMatchList));
 sendMsgToServer(textMatchList);
}

ensuite avec les résultats (plusieurs phrases correspondant a ce que google a décoder) on appel une fonction “sendMsgToServer” qui va envoyer ses phrases aux serveur python qui gère tout la centrale domotique.

public void sendMsgToServer(ArrayList<java.lang.String> aStrings){
String url = "http://192.168.0.6/Sender/XbeeWrapper.php?iCmdType=CMD_SPEAK&iCmdStrings=";
 String aCmd = combine(aStrings,"_");
 url = url + aCmd;
 url = url.replace(' ','-');
 url = Normalizer.normalize(url, Normalizer.Form.NFD);
 url = url.replaceAll("[^\\p{ASCII}]", "");
 grabURL(url);
 }

Attention : pour faire cela on utilise une autre classe qui dérive de classe asynch car dans android toutes les opérations longues doivent être faites ailleurs que dans le thread principale.

private class GrabURL extends AsyncTask<String, Void, Void> {

je vais pas détailler ici pkoi et comment car il existe une multitude de référence sur le sujet sur internet. Bref le serveur python reçoit les phrases et parcours tous les objets du réseaux domotique pour savoir auquel est destine la commande :

def TranslateVocalAction(self,Sentences, Devices):
 logging.warning("Translate : " + str(Sentences))
 #Weight, Device ID, CommandID
 aBestDeviceMatch=(0,0,0)
 for aOneObj in Devices.registeredDevices:
 (aWeight,aCmdId)=aOneObj.getDeviceWeightSpeech(Sentences)
 logging.warning ("DeviceId : " + str(aOneObj.id) + " has weight : " + str(aWeight))
 if(aWeight > aBestDeviceMatch[0]):
 aBestDeviceMatch=(aWeight,aOneObj.id,aCmdId)
 logging.warning("Device is : " + str(aBestDeviceMatch))
 self.SendMessage( str(aBestDeviceMatch[2]),"VoiceAction",Devices)
 return (Devices.getDevice(aBestDeviceMatch[1]).description,aBestDeviceMatch[2])

Pour cela il parcours la description et les commandes possible de tous les objets qui se présentes sous la forme :

VoletSalon = InterupteurMultiStable()
 VoletSalon.id =5
 VoletSalon.description="volets salon"
 VoletSalon.InPossibleCmd ={ "10" : "off fermer ferme","9" : "on ouvre ouvrir","25" : "stop arreter arrete"}
 VoletSalon.InActionsCommands={ "9" : "self.turnOn(9)","10" : "self.turnOff(10)","25" : "self.turnOff(10)"}
 self.registeredDevices.append(VoletSalon)
LumiereSalonHalogene = InterupteurBiStable()
 LumiereSalonHalogene.id =6
 LumiereSalonHalogene.description="lumiere halogene salon"
 LumiereSalonHalogene.InPossibleCmd ={ "13" : "off eteint eteindre","14" : "on allume allumer"}
 LumiereSalonHalogene.InActionsCommands={ "13" : "self.turnOff(13)","14" : "self.turnOn(14)"}
 self.registeredDevices.append(LumiereSalonHalogene)
....

et donne un poids pour chaque objet en fonction de sa description et de ses possibles commandes. Le poids dépend du nombre de mots commun entre les strings et les mots présent dans la phrase (pondéré par leur longueur)

Ensuite il exécute la commande qui a le poids le plus grand. C’est assez facile en fin de compte. En parallèle le serveur python renvoi la commande exécuté et l’objet associe :

return (Devices.getDevice(aBestDeviceMatch[1]).description,aBestDeviceMatch[2])

Ces infos sont ensuite affiches sur la UI du telephonne portable pour que l utilisateur puisse vérifier :

protected void onPostExecute(Void unused) {
 Dialog.dismiss();
 if (Error != null) {
 Toast.makeText(VoiceRecognitionActivity.this, Error, Toast.LENGTH_LONG).show();
 } else {
 Toast.makeText(VoiceRecognitionActivity.this, "Source: " + Content, Toast.LENGTH_LONG).show();
 }
 }

Je ne détaille pas bcp plus car tous le code est tjs visible au même endroit sur le dépôt central de mon projet domotique et assez court pour être compris facilement.

Je ferais une vidéo du système en action ASAP.