Création d’un dépôt d’image docker prive pour distribuer notre application sur un ensemble de nœuds distribues.
Pour ceux qui ne connaissent pas Docker : https://www.docker.io/
Un Dépôt d’image docker s’appelle un “registery”. Il s’agit d’un serveur code en python et demande donc certaines dépendance pour être installe….
Heureusement les gens de docker ont également créé une image docker qui contient tout ce qu’il faut pour mettre en place notre registery en quelques secondes. Le seul pré-requit est donc d’installer docker
Installation de docker
Pour tester j’utilise une centOs 6.4 sur AWS. L’installation de Docker est assez simple grâce à la documentation : http://docs.docker.io/en/latest/
[root@ip-10-170-79-155 conf]# sudo yum -y install docker-io
puis
[root@ip-10-170-79-155 conf]# sudo service docker start
 Starting cgconfig service:                                 [  OK  ]
 Starting docker:                                           [  OK  ]
 [root@ip-10-170-79-155 conf]#
Vérification de l’installation
La vérification de l’installation peut se faire simplement en démarrant un bash depuis un container contenant fedora
[root@ip-10-170-79-155 conf]# sudo docker run -i -t fedora /bin/bash
Unable to find image 'fedora' (tag: latest) locally
Pulling repository fedora
58394af37342: Download complete
0d20aec6529d: Download complete
511136ea3c5a: Download complete
8abc22fbb042: Download complete
bash-4.2# ls
bin  dev  etc  home  lib  lib64  lost+found  media  mnt  opt  proc  root  run  sbin  srv  sys  tmp  usr  var
bash-4.2#
Maintenant que l’on a installé docker on va pouvoir créer notre repository privé.
Création d’un repository privé
Il suffit de récupérer un container docker qui contient le serveur python faisant office de repository avec toutes ses dépendances
[root@ip-10-235-32-145 conf]# docker pull samalba/docker-registry
Pulling repository samalba/docker-registry
2eabb5a82e71: Download complete
511136ea3c5a: Download complete
46e4dee27895: Download complete
476aa49de636: Download complete
8332c1d90a62: Download complete
324b0d2e019a: Download complete
c19da4fc3dea: Download complete
4b494adef24f: Download complete
10e80f2583d5: Download complete
76b4a87578b7: Download complete
ac854be3b13a: Download complete
1fd060b2bdb1: Download complete
Il suffit ensuite de démarrer le container
[root@ip-10-235-32-145 conf]# docker run -d -p 5000:5000 samalba/docker-registry
71e3adbb75eaad87e8f32462cd0963988092935f60fce9ffd74a43b852e942a7
On dispose maintenant d’un registery docker que l’on peut utiliser pour déployer notre application. Il ne faut pas oublier d’ouvrir le port 5000 sur la machine ou tourne notre registery….
Utilisation du registery privé
Création d’une image docker
On va tester l’utilisation de notre registre privee depuis une autre machine. La première chose à faire est de créer une nouvelle image qui contient notre software. Pour cela on utilise la fonction build de docker.
La création d’une image est très bien expliquée sur les sites suivants :
Voilà le dockerfile correspondant à mon application :
#https://index.docker.io/search?q=centos
#https://www.docker.io/learn/dockerfile/level1/
#http://docs.docker.io/en/latest/use/builder/

#Image docker de base : Centos (https://index.docker.io/_/centos/)
FROM centos

#le mainteneur du package
MAINTAINER Charles Walker, charles.walker.37@gmail.com

# Usage: ADD [source directory or URL] [destination directory]
# It has to be a relative path ! It will not works if runing build with stdin like docker build -t TEST1 - < Dockerfile
ADD ./packages /root/packages
ADD ./Data /root/Data
ADD ./conf /root/conf
ADD ./AWS_Non1aData /root/AWS_Non1aData

#commande a lancer sur le container pdt sa creation
#RUN

#La commande a execute qd le container se lance
#le hash dans la commande indique un argument
ENTRYPOINT /root/conf/installAgent.sh #

#Port to "open"
EXPOSE 22 80 443 4001 4369 5000 5984 7001 8080 8091 8092 8140 10000 10001 10002 10003 11210 11211 14111 20022 21100 22222 48007 49007 50007

#le repetoire qu on monte depuis le host physique
VOLUME ["/ama"]
Je vais maintenant demander a docker de mon construire une nouvelle image a partir de ce dockerfile avec :
[root@ip-10-138-39-50 ~]# docker build -t TEST4 .
Uploading context 1.489 GB
Uploading context
Step 1 : FROM centos
 ---> 539c0211cd76
Step 2 : MAINTAINER Charles Walker, charles.walker.37@gmail.com
 ---> Using cache
 ---> 719b786c1be6
Step 3 : ADD ./packages /root/packages
 ---> Using cache
 ---> 6b65b75fd77c
Step 4 : ADD ./Data /root/Data
 ---> e34e5c199d29
Step 5 : ADD ./conf /root/conf
 ---> d438752ee616
Step 6 : ADD ./AWS_Non1aData /root/AWS_Non1aData
 ---> 419f91258841
Step 7 : ENTRYPOINT /root/conf/installAgent.sh #
 ---> Running in ad779fd56403
 ---> d6156694fbb6
Step 8 : EXPOSE 22 80 443 4001 4369 5000 5984 7001 8080 8091 8092 8140 10000 10001 10002 10003 11210 11211 14111 20022 21100 22222 48007 49007 50007
 ---> Running in 492ee8547e8b
 ---> c91f6583e370
Step 9 : VOLUME ["/ama"]
 ---> Running in 7b35f3a0dedd
 ---> b220758ee96e
Successfully built b220758ee96e
La vérification est simple :
[root@ip-10-138-39-50 ~]# docker images
REPOSITORY          TAG                 IMAGE ID            CREATED             VIRTUAL SIZE
TEST4               latest              b220758ee96e        8 minutes ago       1.782 GB
centos              6.4                 539c0211cd76        10 months ago       300.6 MB
centos              latest              539c0211cd76        10 months ago       300.6 MB
Upload d’image docker sur notre registery privé
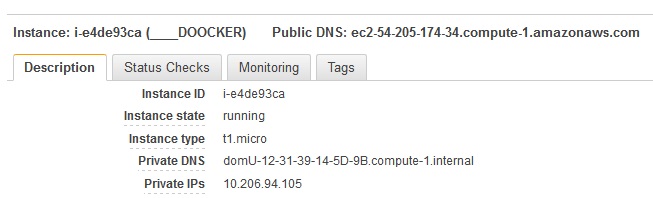
On va maintenant pousser cette image sur notre registery local. Pour rappel ce dernier tourne sur un autre serveur AWS :
On commencer par renommerl’image puisque Docker utilise le namespace présent dans le nom de l’image pour savoir sur quel registery il doit pousser.
[root@ip-10-238-143-211 ~]# docker tag TEST4 domU-12-31-39-14-5D-9B.compute-1.internal:5000/myrepo
Ainsi Docker va maintenant pousser cette image sur notre registery privé. Le push se fait de la manière suivante :
[root@ip-10-238-143-211 ~]# docker push domU-12-31-39-14-5D-9B.compute-1.internal:5000/myrepo
The push refers to a repository [domU-12-31-39-14-5D-9B.compute-1.internal:5000/myrepo] (len: 1)
Sending image list
Pushing repository domU-12-31-39-14-5D-9B.compute-1.internal:5000/myrepo (1 tags)
539c0211cd76: Image successfully pushed
155d292465db: Image successfully pushed
0cee42788752: Image successfully pushed
9eadab9e81c4: Image successfully pushed
3baae99c022d: Image successfully pushed
54cd5c7eccc3: Image successfully pushed
b58b382eb217: Image successfully pushed
f768630bab4c: Image successfully pushed
feab39ed50f7: Image successfully pushed
Pushing tags for rev [feab39ed50f7] on {http://domU-12-31-39-14-5D-9B.compute-1.internal:5000/v1/repositories/myrepo/tags/latest}
Utilisation de notre image
Nous allons maintenant créer un 3eme nœud AWS pour downloader notre image docker et l’utiliser.
On va récupérer notre image depuis notre nouveau noeud avec :
[root@ip-10-73-145-136 conf]# docker images
REPOSITORY          TAG                 IMAGE ID            CREATED             VIRTUAL SIZE
[root@ip-10-73-145-136 conf]# docker pull domU-12-31-39-14-5D-9B.compute-1.internal:5000/myrepo
Pulling repository domU-12-31-39-14-5D-9B.compute-1.internal:5000/myrepo
155d292465db: Download complete
0cee42788752: Download complete
feab39ed50f7: Download complete
539c0211cd76: Download complete
b58b382eb217: Download complete
f768630bab4c: Download complete
3baae99c022d: Download complete
54cd5c7eccc3: Download complete
9eadab9e81c4: Download complete
[root@ip-10-73-145-136 conf]# docker images
REPOSITORY                                              TAG                 IMAGE ID            CREATED             VIRTUAL SIZE
domU-12-31-39-14-5D-9B.compute-1.internal:5000/myrepo   latest              feab39ed50f7        3 hours ago         1.782 GB
[root@ip-10-73-145-136 conf]#
Maintenant que l’on a notre image on va lancer son exécution avec un paramètre. Pour rappel le container va essayer de lancer un script shell “installAgent.sh” au démarrage. Ce script a besoin d’une adresse IP que je passe donc en paramètrede la commande run de docker.
[root@ip-10-239-7-206 conf]# docker run domU-12-31-39-14-5D-9B.compute-1.internal:5000/myrepo 127.0.0.1
**********Install OS Packages with YUM**********
Loaded plugins: fastestmirror
Error: Cannot retrieve repository metadata (repomd.xml) for repository: base. Please verify its path and try again
Could not retrieve mirrorlist http://mirrorlist.centos.org/?release=6&arch=x86_64&repo=os error was
14: PYCURL ERROR 7 - "Failed to connect to 2a02:2498:1:3d:5054:ff:fed3:e91a: Network is unreachable"
Loaded plugins: fastestmirror
Le container est lancé correctement. Mon script s’exécute avec le paramètre spécifié dans le run de docker. Cependant mon script ne fonctionne pas car yum ne réussit pas à récupérer les packages.
YUM ne réussit pas installer les packages car il essaye de communiquer avec les serveur distant en IPV6 et docker ne supporte pas l IPv6 :
Je dois donc trouver une solution pour mon script mais cela n’a aucun rapport avec notre sujet actuel.
Voilà donc comment mettre en place un registery privé Docker pour partager une application propriétaire dans notre Cluster.